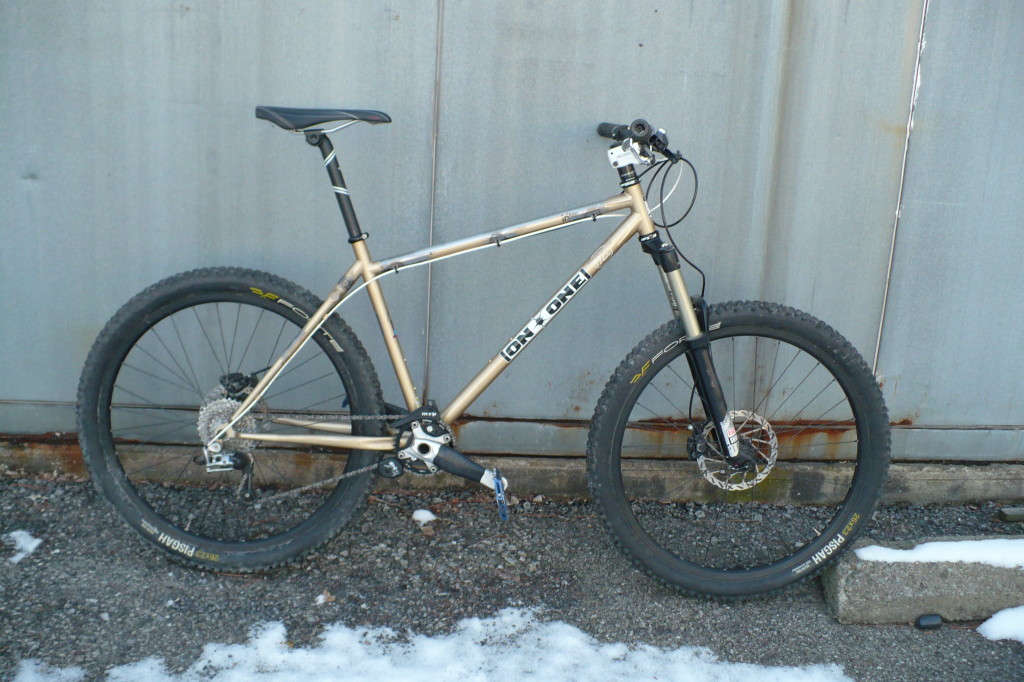
After I got the frame welded up, some product testing was in order. I was planning on having the frame powdercoated, which would be a fairly expensive endeavor and I wanted to make sure everything worked. The only bit that really needed testing were the ISCG tabs. So I built the bike up, mounted the chain guide and hit the road (literally and figuratively).
The weather was nice on my day off and I decided to ride the rail trail over to some shorter local trails that wouldn’t have too much snow on them. It totaled twenty-eight miles and everything checked out but a lot of the more technical parts were icy and I had to walk – so I couldn’t thoroughly test everything.
The next weekend I mounted some slick tires, climbed into a truck with some friends and drove to Cleveland to ride Ray’s Indoor Mountain Bike Park. The drive was hell on the bike. I had loaded my (largely) raw steel frame onto a Thule T2 and proceeded to put it through 480 miles of rain, snow, sleet and the rest of Pennsylvania’s winter misery (which I’m convinced is more miserable than that of the states that surround it) en route to indoor goodness. Here’s some gratuitous hack GoPro footage of me rolling the pump track (no pedaling, I swear!).
This bike isn’t much of a dirt jumper, and if I was going to ride Ray’s a lot I’d get something else – but for the odd seasonal visit it held its own and I had a blast. Most importantly it confirmed that the bike was 100% mechanically. With that said, the only thing left to do was paint it!
Part Five will be the most exciting yet, as everything starts to come together.
(This is part three in a series on my steel One On Inbred modifications. Check out part one and part two to get the full story.)
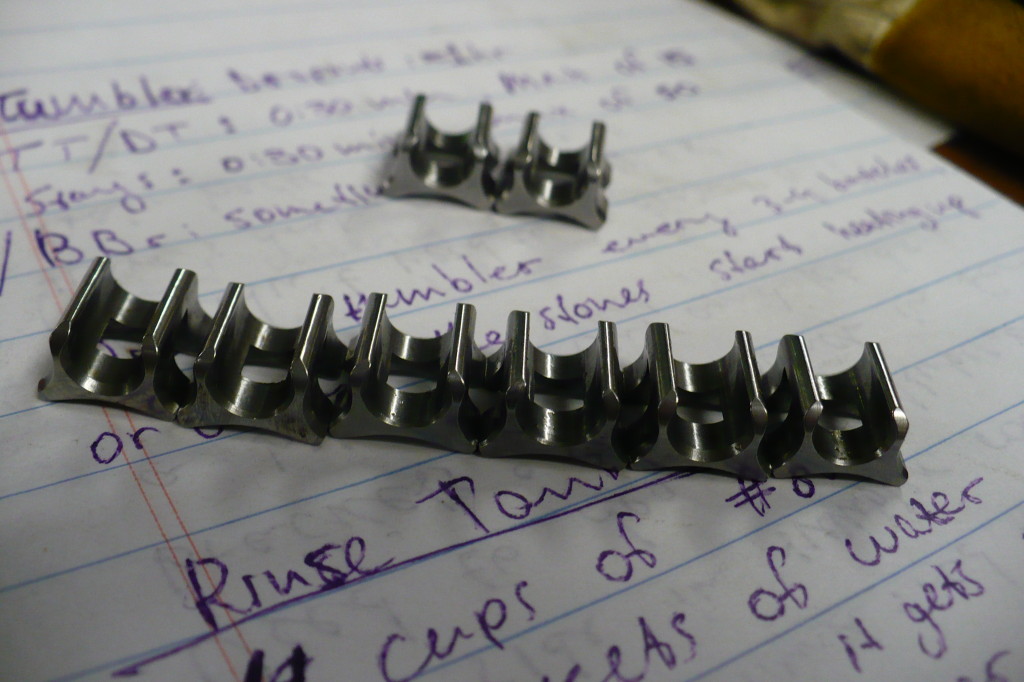
This step is perhaps the most critical. It adds a personal touch, makes the frame unique and gives it a certain personality stock frames don’t have. It also makes it superior than the previous Inbred I had. When a bike is stolen from you, you have to replace it with something of a higher quality. You have to move on and up. Bigger and better. I call it the George Jefferson effect. I guess it rationalizes the emotion somehow (I never liked that bike anyway). I accomplished this by ordering cable guides and ISCG tabs from Paragon Machine Works. I ordered six large miter guides (for the top tube) and two small miter guides (for the seat stay).
Cable guides, beautiful cable guides!
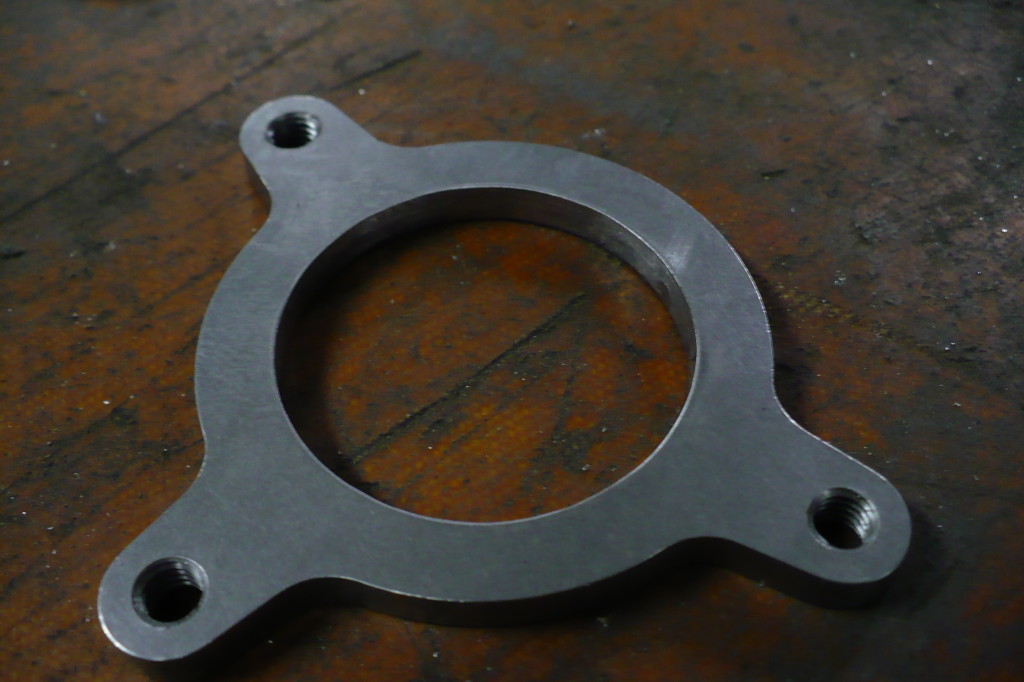
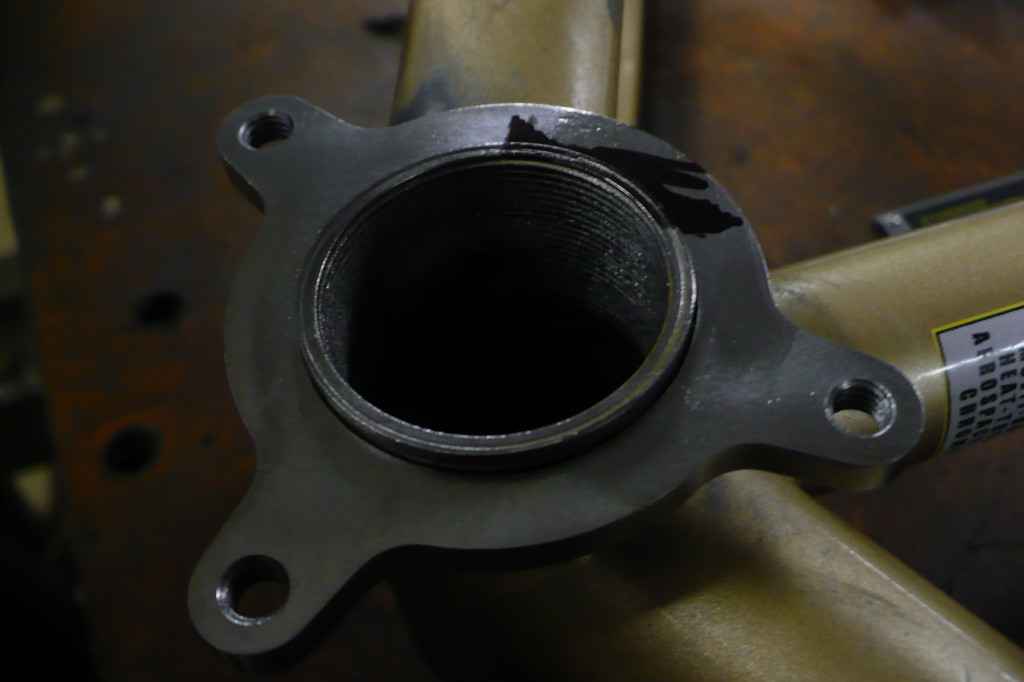
ISCG tabs!
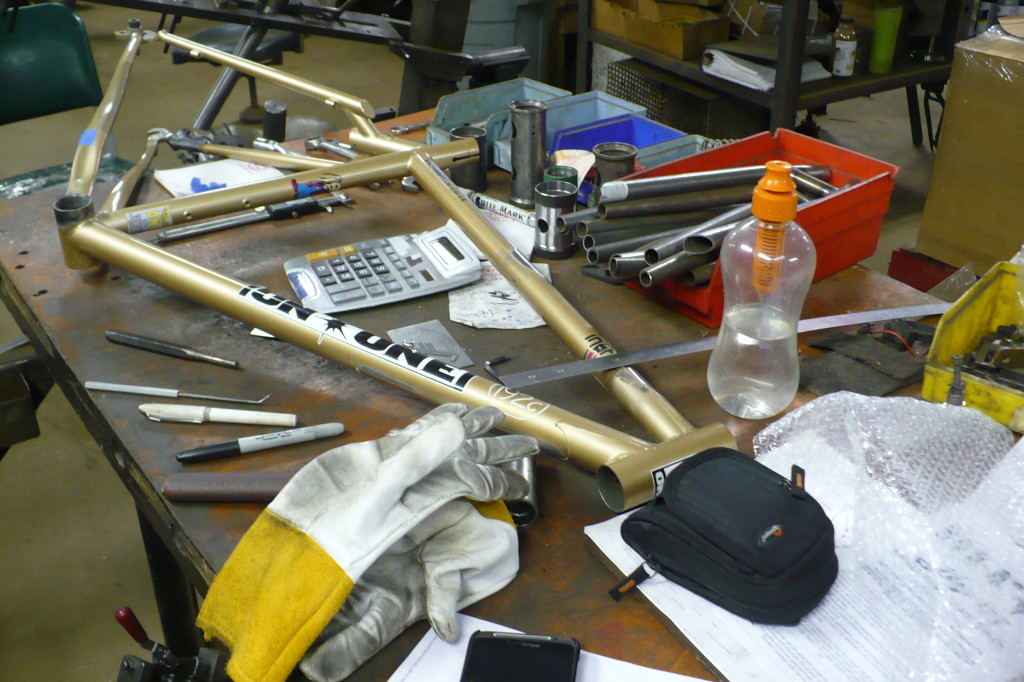
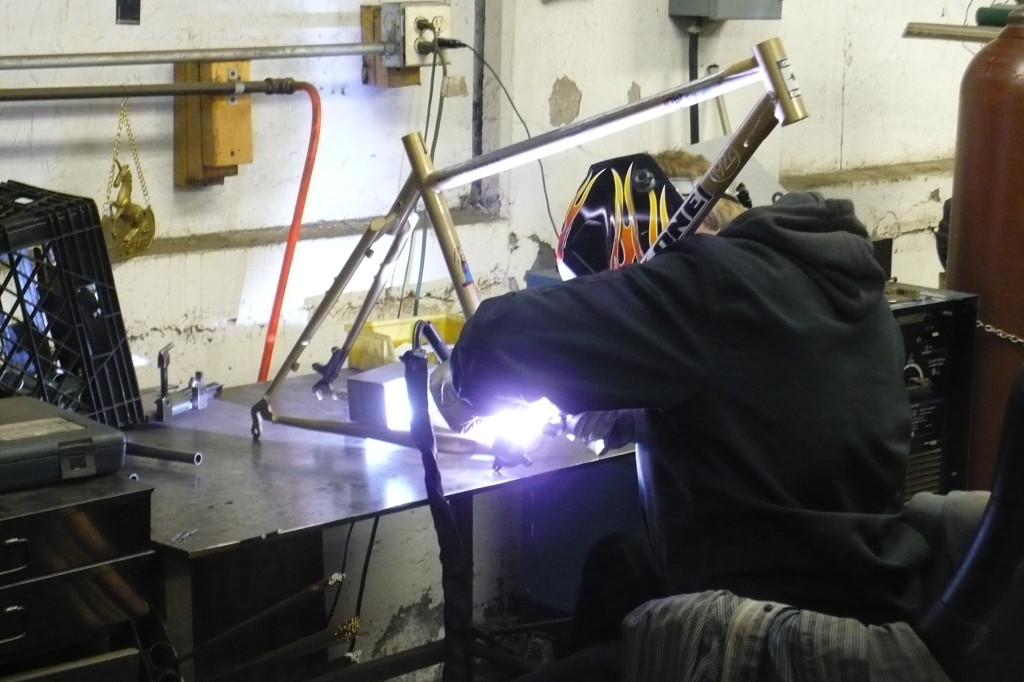
That very same day the parts arrived, my welder Paul called and asked if I could come out to Binghamton that night to have him do the work. I wanted this bike ready for my trip to Ray’s Indoor Mountain Bike Park the next weekend, so I drove out.
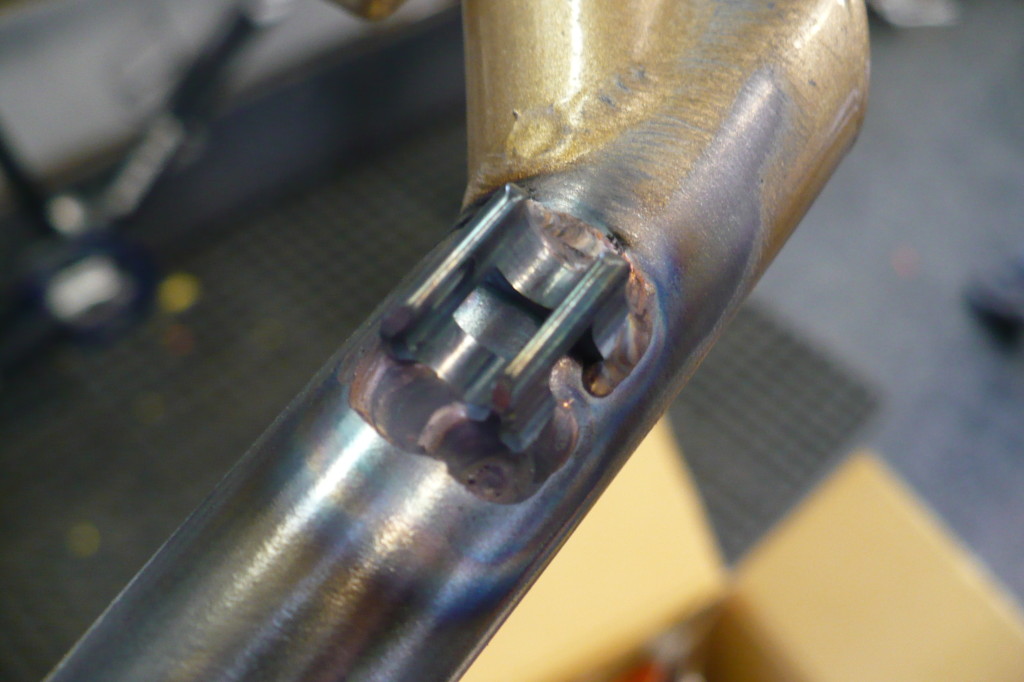
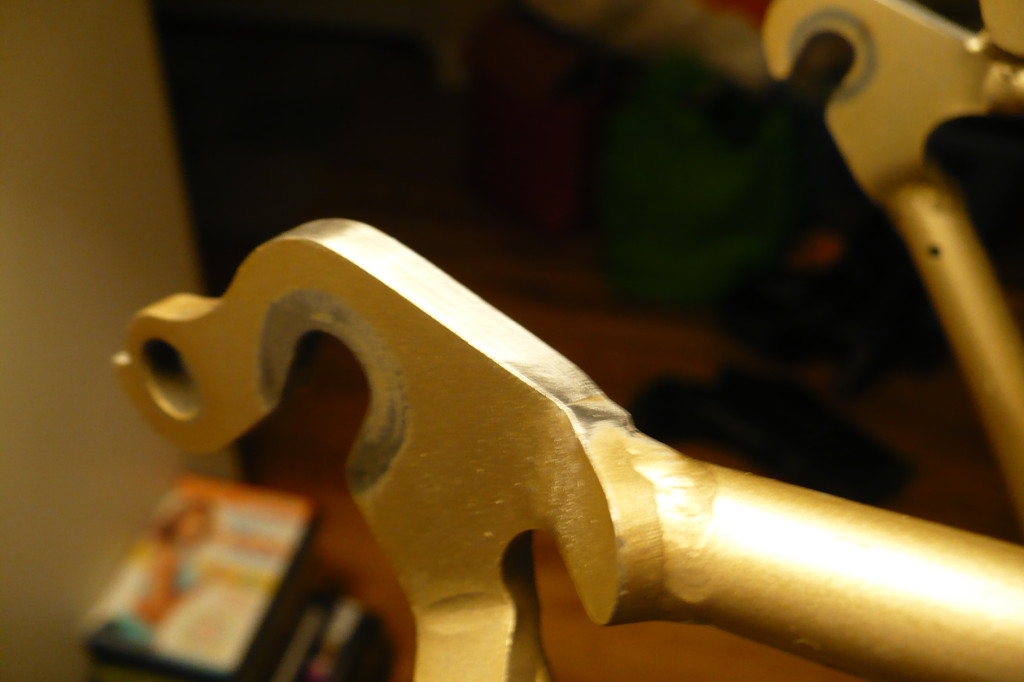
We got started on the ISCG tabs since they would require the most work. The inner diameter of the plate was smaller than the outer diameter of the bottom bracket shell, so Paul mitered the hole bigger with a 1.5″ bit. Unfortunately this still wasn’t enough to fit over the shell so I went to work with the grinding wheel and enlarged the hole a little bit more. The back side also needed to be ground down to clear the chain stay. It took a while – grind, test fit, grind, test fit, so on and so forth.
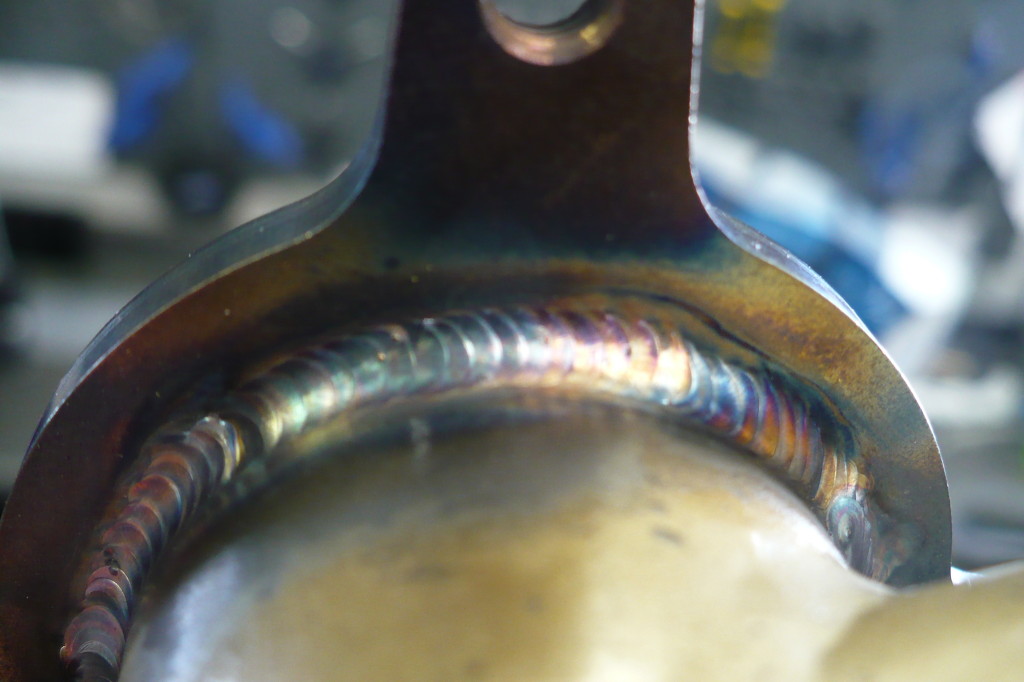
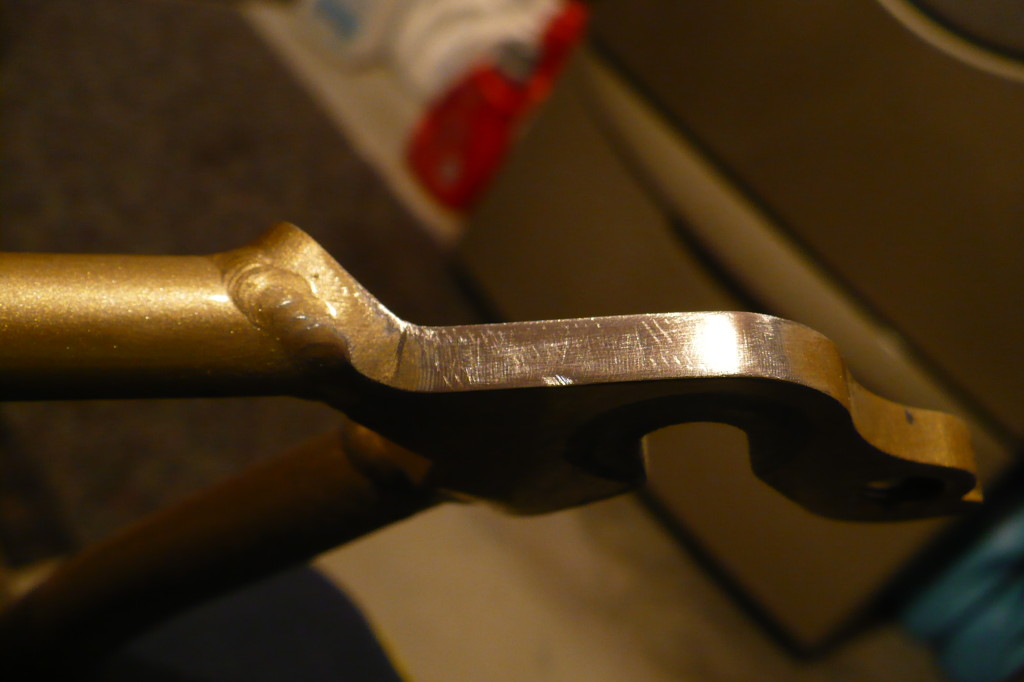
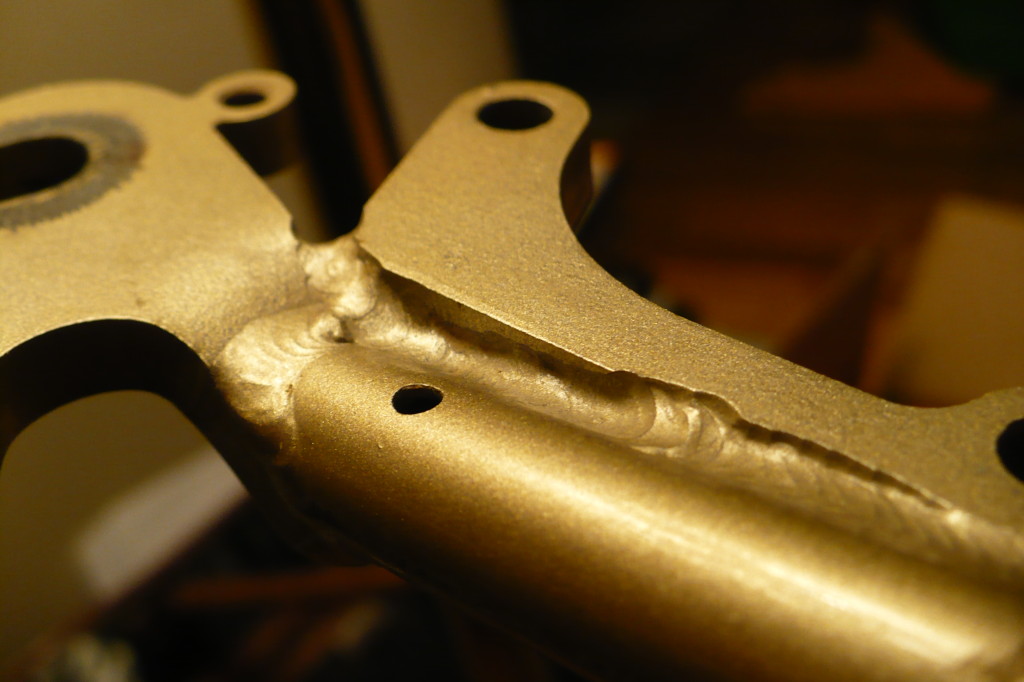
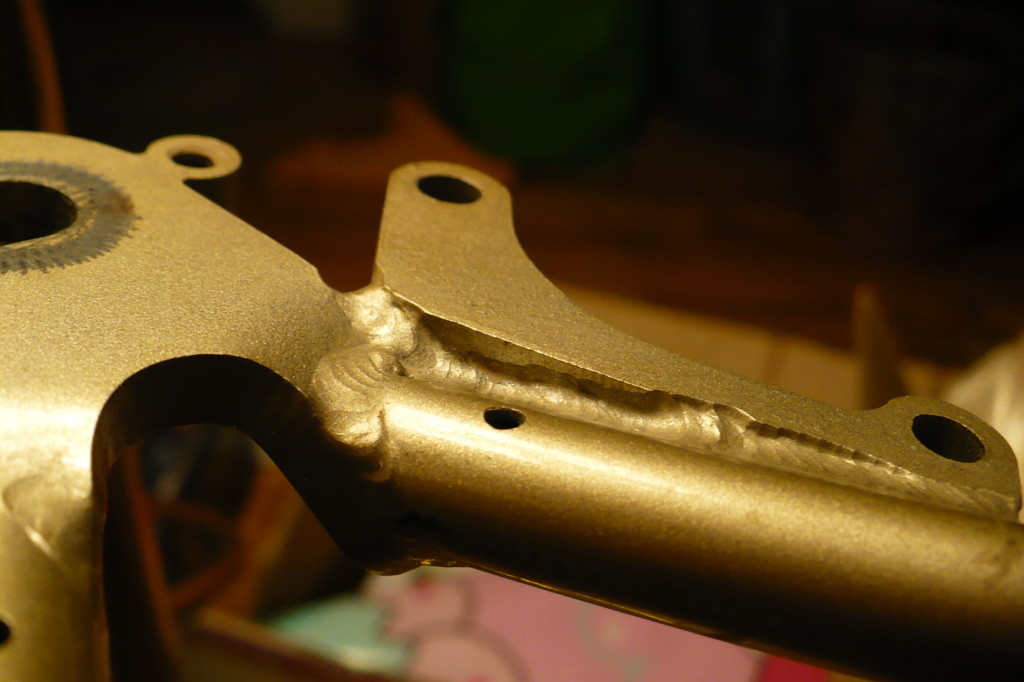
While I was doing that Paul turned his attention to that pesky brake mount. He used a wire wheel to take the paint off and laid down a gorgeous bead to gussy it up a bit.
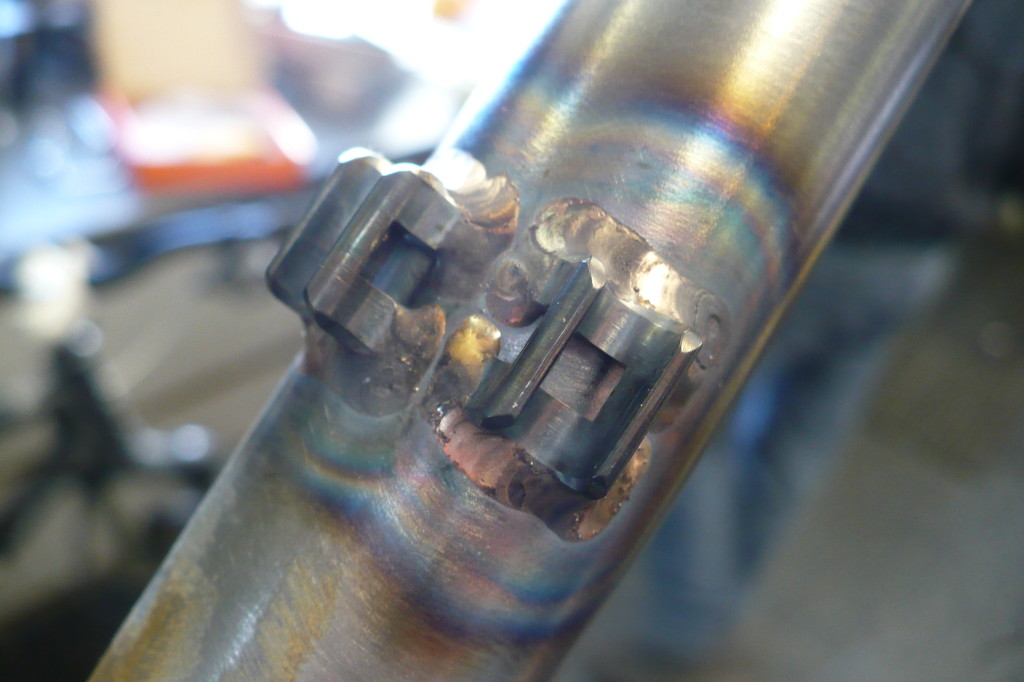
By then I had the ISCG plate ready, so we refocused on that. Tab placement was tricky. The ISCG standard specifies that the plate sits 2.5mm recessed from the face of the BB shell and that the rearward tab sits at an angle of 50 degrees from an imaginary center line between the rear drop out and the BB. Creating a center line wasn’t hard – we installed a dummy axle and ran a string from that to the center of the bottom bracket then used tape to mark the line. Once we had a reference line to work off, we protracted the angle and marked the shell and the plate.
The tricky part is creating the 2.5mm recess. We used a BB-mount ISCG tab, allen bolts and an old bottom bracket to create a surface upon which to rest the plate so Paul could tack it in place. I’ve read about frames with chainguide tabs that are just tacked on and snap off when the guide took a hard impact. While the odds of that are slim there’s no sense going to all this trouble and risking it. Paul laid an immaculate “stack of dimes” weld around the whole perimeter.
That sucker ain’t goin’ nowhere
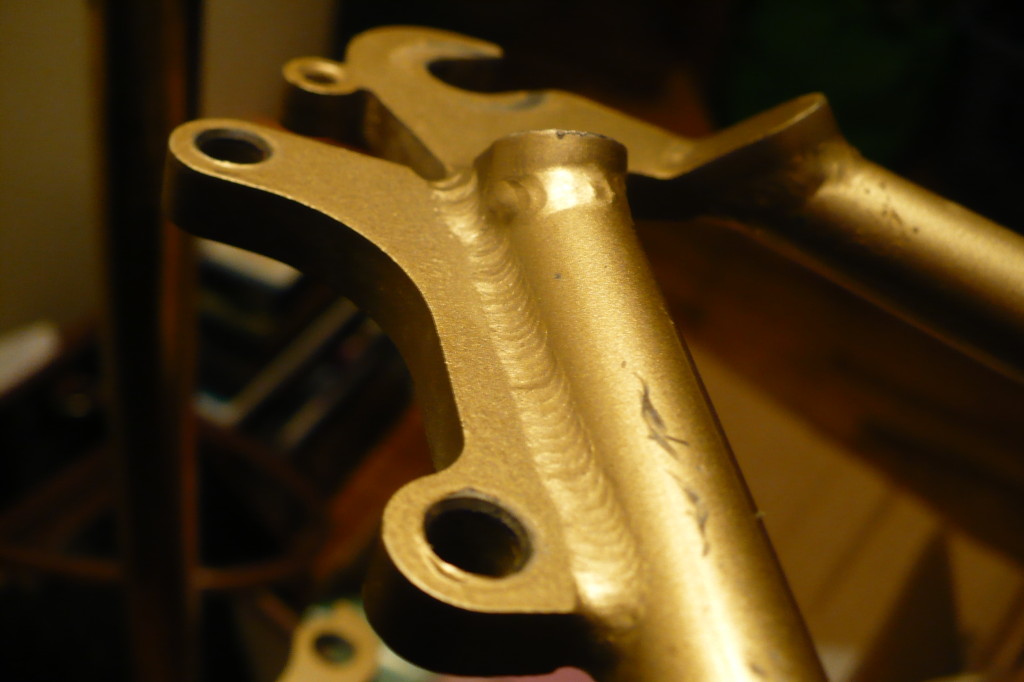
With the tabs all finished we transitioned to cable guides. While the original guides were on top of the top tube, we opted to mount them underneath where they would look cleaner. Paul also suggested running the brake hose under the seat stay to match the derailleur cable. Rear derailleur and brake guides, under the top tube
Seat stay brake guide
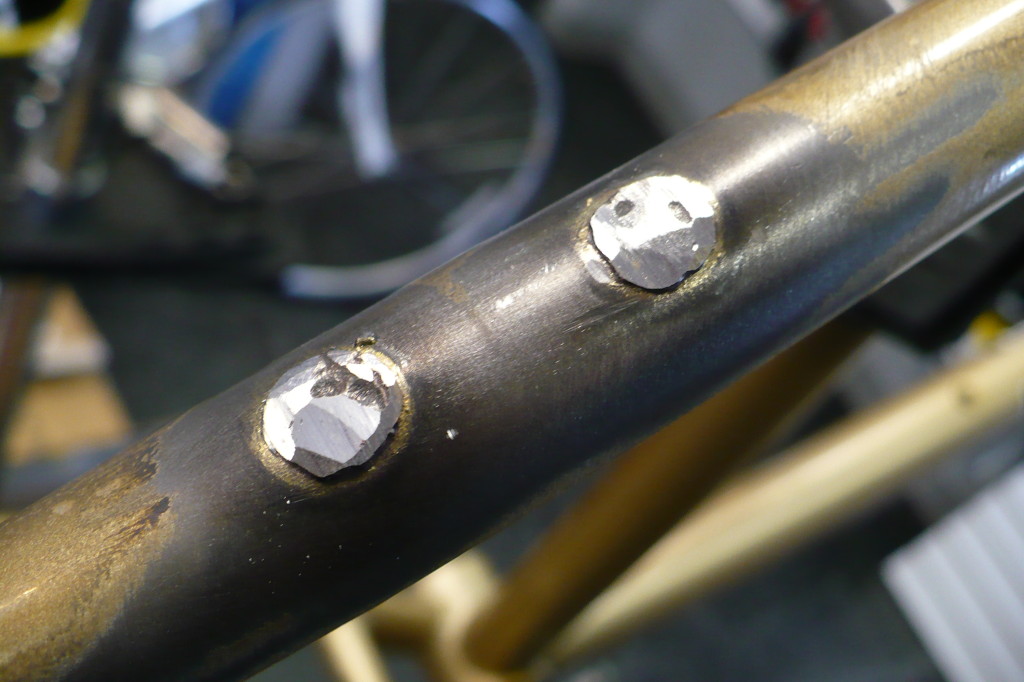
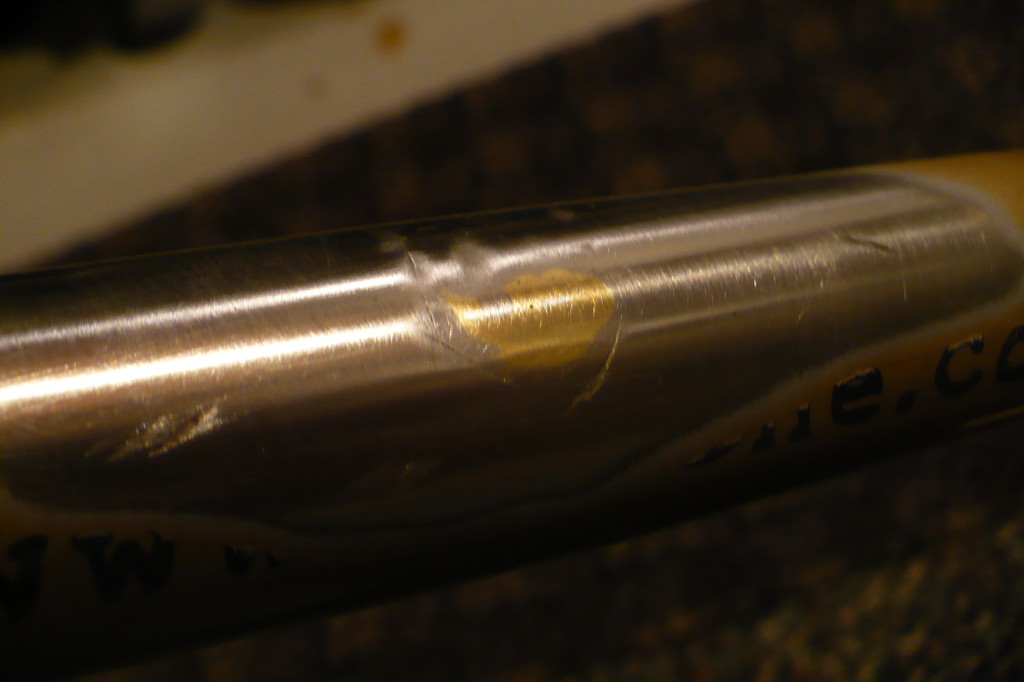
Welding these was pretty straightforward once we figured out placement and soon enough we were on to my final request: filling rack and v-brake mounts. By now it was close to midnight and since these required the least preparation we did it the quick and dirty way. First we ground down the heads a bit, and then Paul filled the threaded fitting. There was a little hesitation, as these fittings were originally brazed into the frame and when Paul welded the filler, the brass more or less melted and threatened to move the placement of the braze on. Fortunately it solidified quickly and there were no issues. We left the grinding for another day and I went home.
V-brake mounts You can see the ring of brass around the perimeter
And with that, the technical work was done. Stay tuned for part 4…
(This is part two of a series of posts on my custom steel hardtail project. Read part one here.)
Once I received the frame I got to work immediately. I needed to remove the rest of the cable guides, in preparation for new ones. I also decided to remove the front derailleur housing stop and the lower rack mounts. Here you can see how the cable guides were taken off:
So I filed them down
Rear rack mounts removed
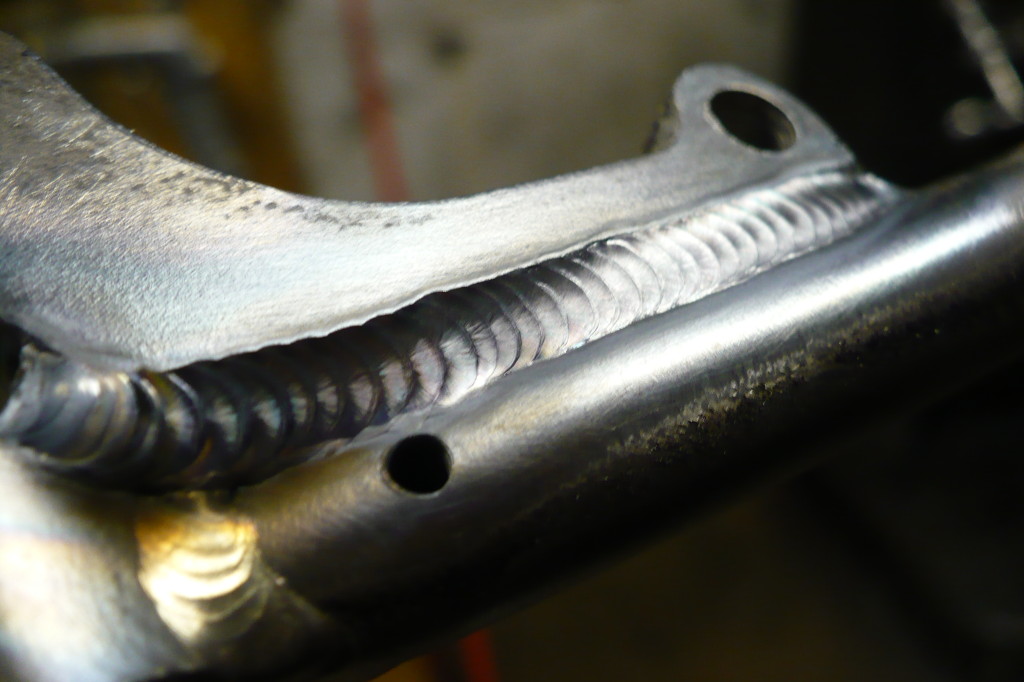
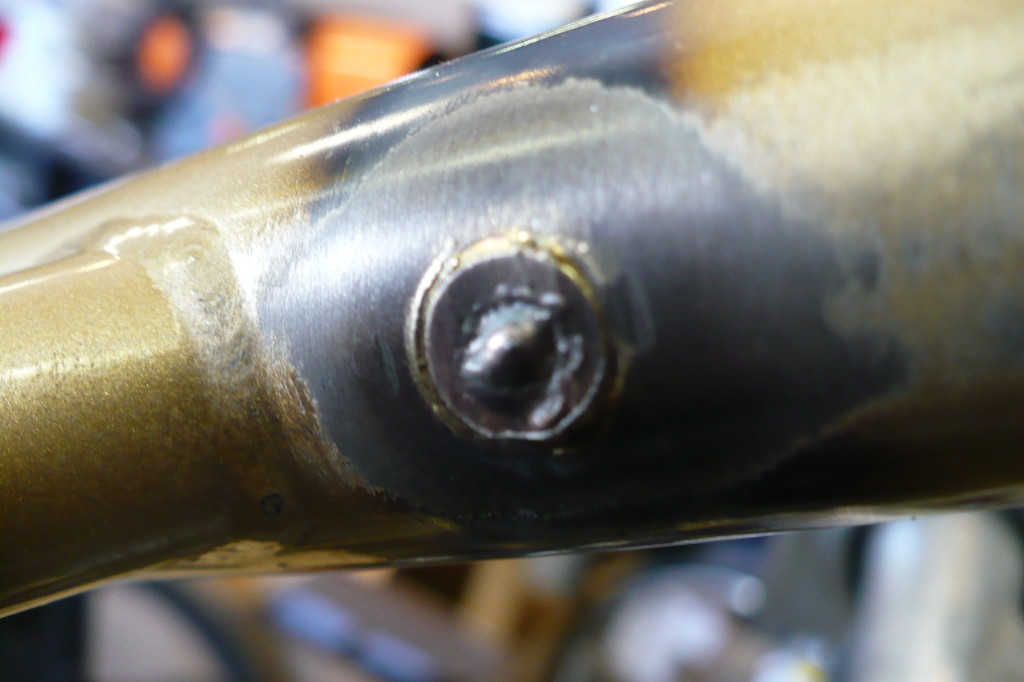
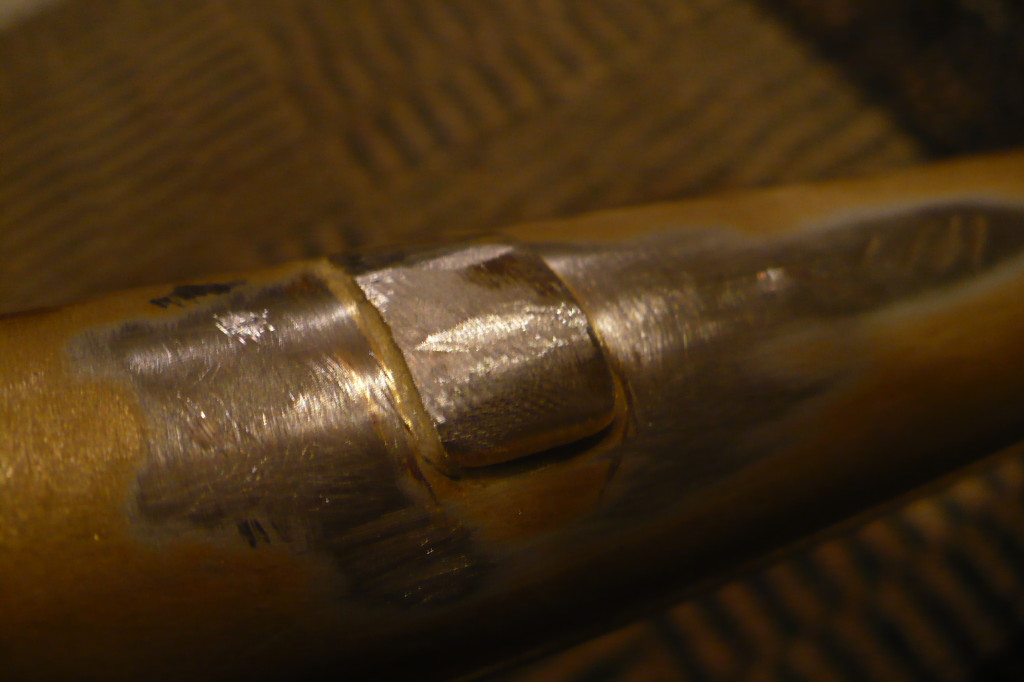
I also inspected the frame to make sure it wasn’t damaged or cracked in any way. I did find one spot that concerned me. The weld on the disc mount looked sloppy on the inside edge.
The outside however, looked fine
After asking some experienced frame builders, they agreed that it looked sloppy but were of the opinion that it wouldn’t be an issue structurally. Either way, nothing a little time under the torch can’t fix!
In Part Three, the frame will go to the frame builder who will add ISCG tabs, cable guides and finishing touches.
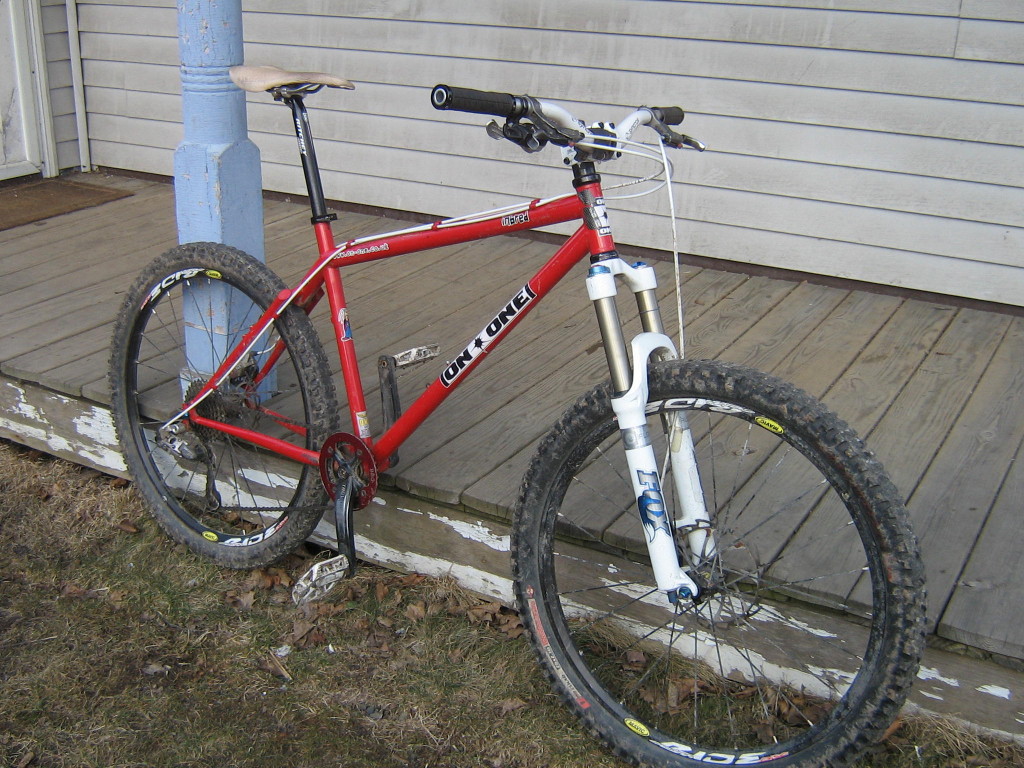
Two years ago I bought a steel On One Inbred frame and built it into an all mountain-style hardtail using parts off my Stumpjumper. It was a great bike – similar geometry to my long travel full suspension rig, but with a sprightly playfulness not present there. It had a 140mm Fox Float, 1×9 X.9 drivetrain with Mavic wheels, a short stem and a wide bar. It was a candy cane red and white and weighed just over 27lbs. Not too shabby for a parts bin build. I enjoyed it immensely for days when I didn’t want to lug around the extra heft of my fully.
I say “enjoyed” (past tense) because on my second day living in California, an active member of the scum of the Earth club stole it off the back of my car while I was looking for apartments. I filed a police report, but as most are surely aware those rarely go anywhere and finding stolen bikes falls slightly below ticketing jaywalkers on most precincts’ priority lists. Such is life.
A couple weeks later I was jonesing for the lovely ride quality of steel, so I started building another similar bike up. I picked up a Ragley Blue Pig frame for cheap, found a Rockshox Revelation on Ebay for pennies on the dollar and got to work. I rode that bike for a while, but it wasn’t the same. The frame alone is much beefier and overbuilt and that contributed to a overall bike weight that was 2-3lbs more than the On One. And it wasn’t as pretty. (It doesn’t matter how nice the bike rides, you still have to look at that face every morning)
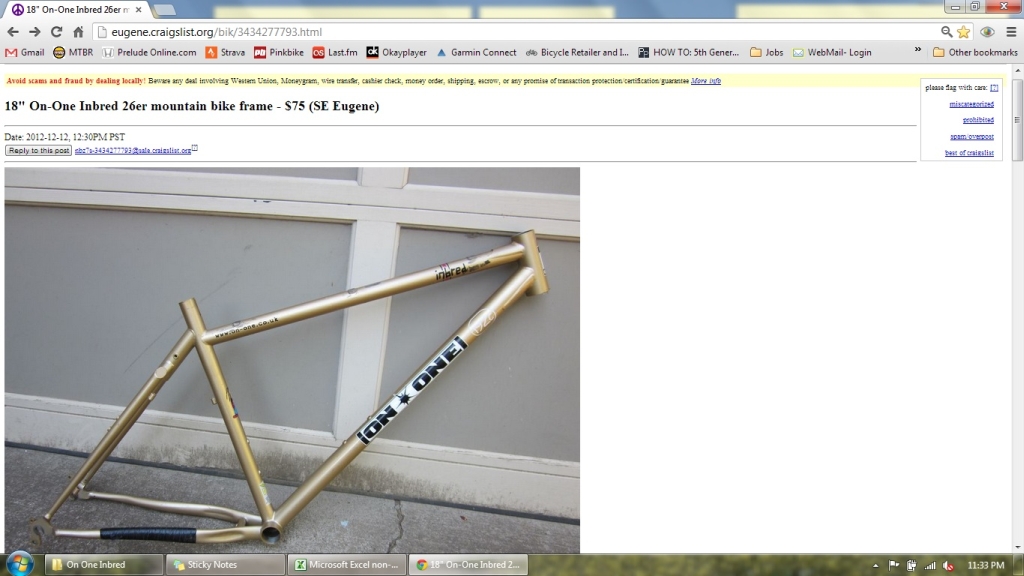
So began the quest to find another one. I sourced an 18″ frame on craigslist in Oregon for $75 and the seller agreed to ship it. It was in rough shape but I was OK with that. I had secretly hatched a plan for some custom additions. The frame I bought had the cable guides ground off – I’m not sure why. I also wanted to add ISCG tabs for a proper chainguide, and remove the fender/rack mounts. My friend Paul welds BMX frames for a small company in the Binghamton area so I ordered parts from Paragon Machine Works and he offered to do the work for me.
Rebuild and Adjust Santa Cruz VPP Suspension Pivots
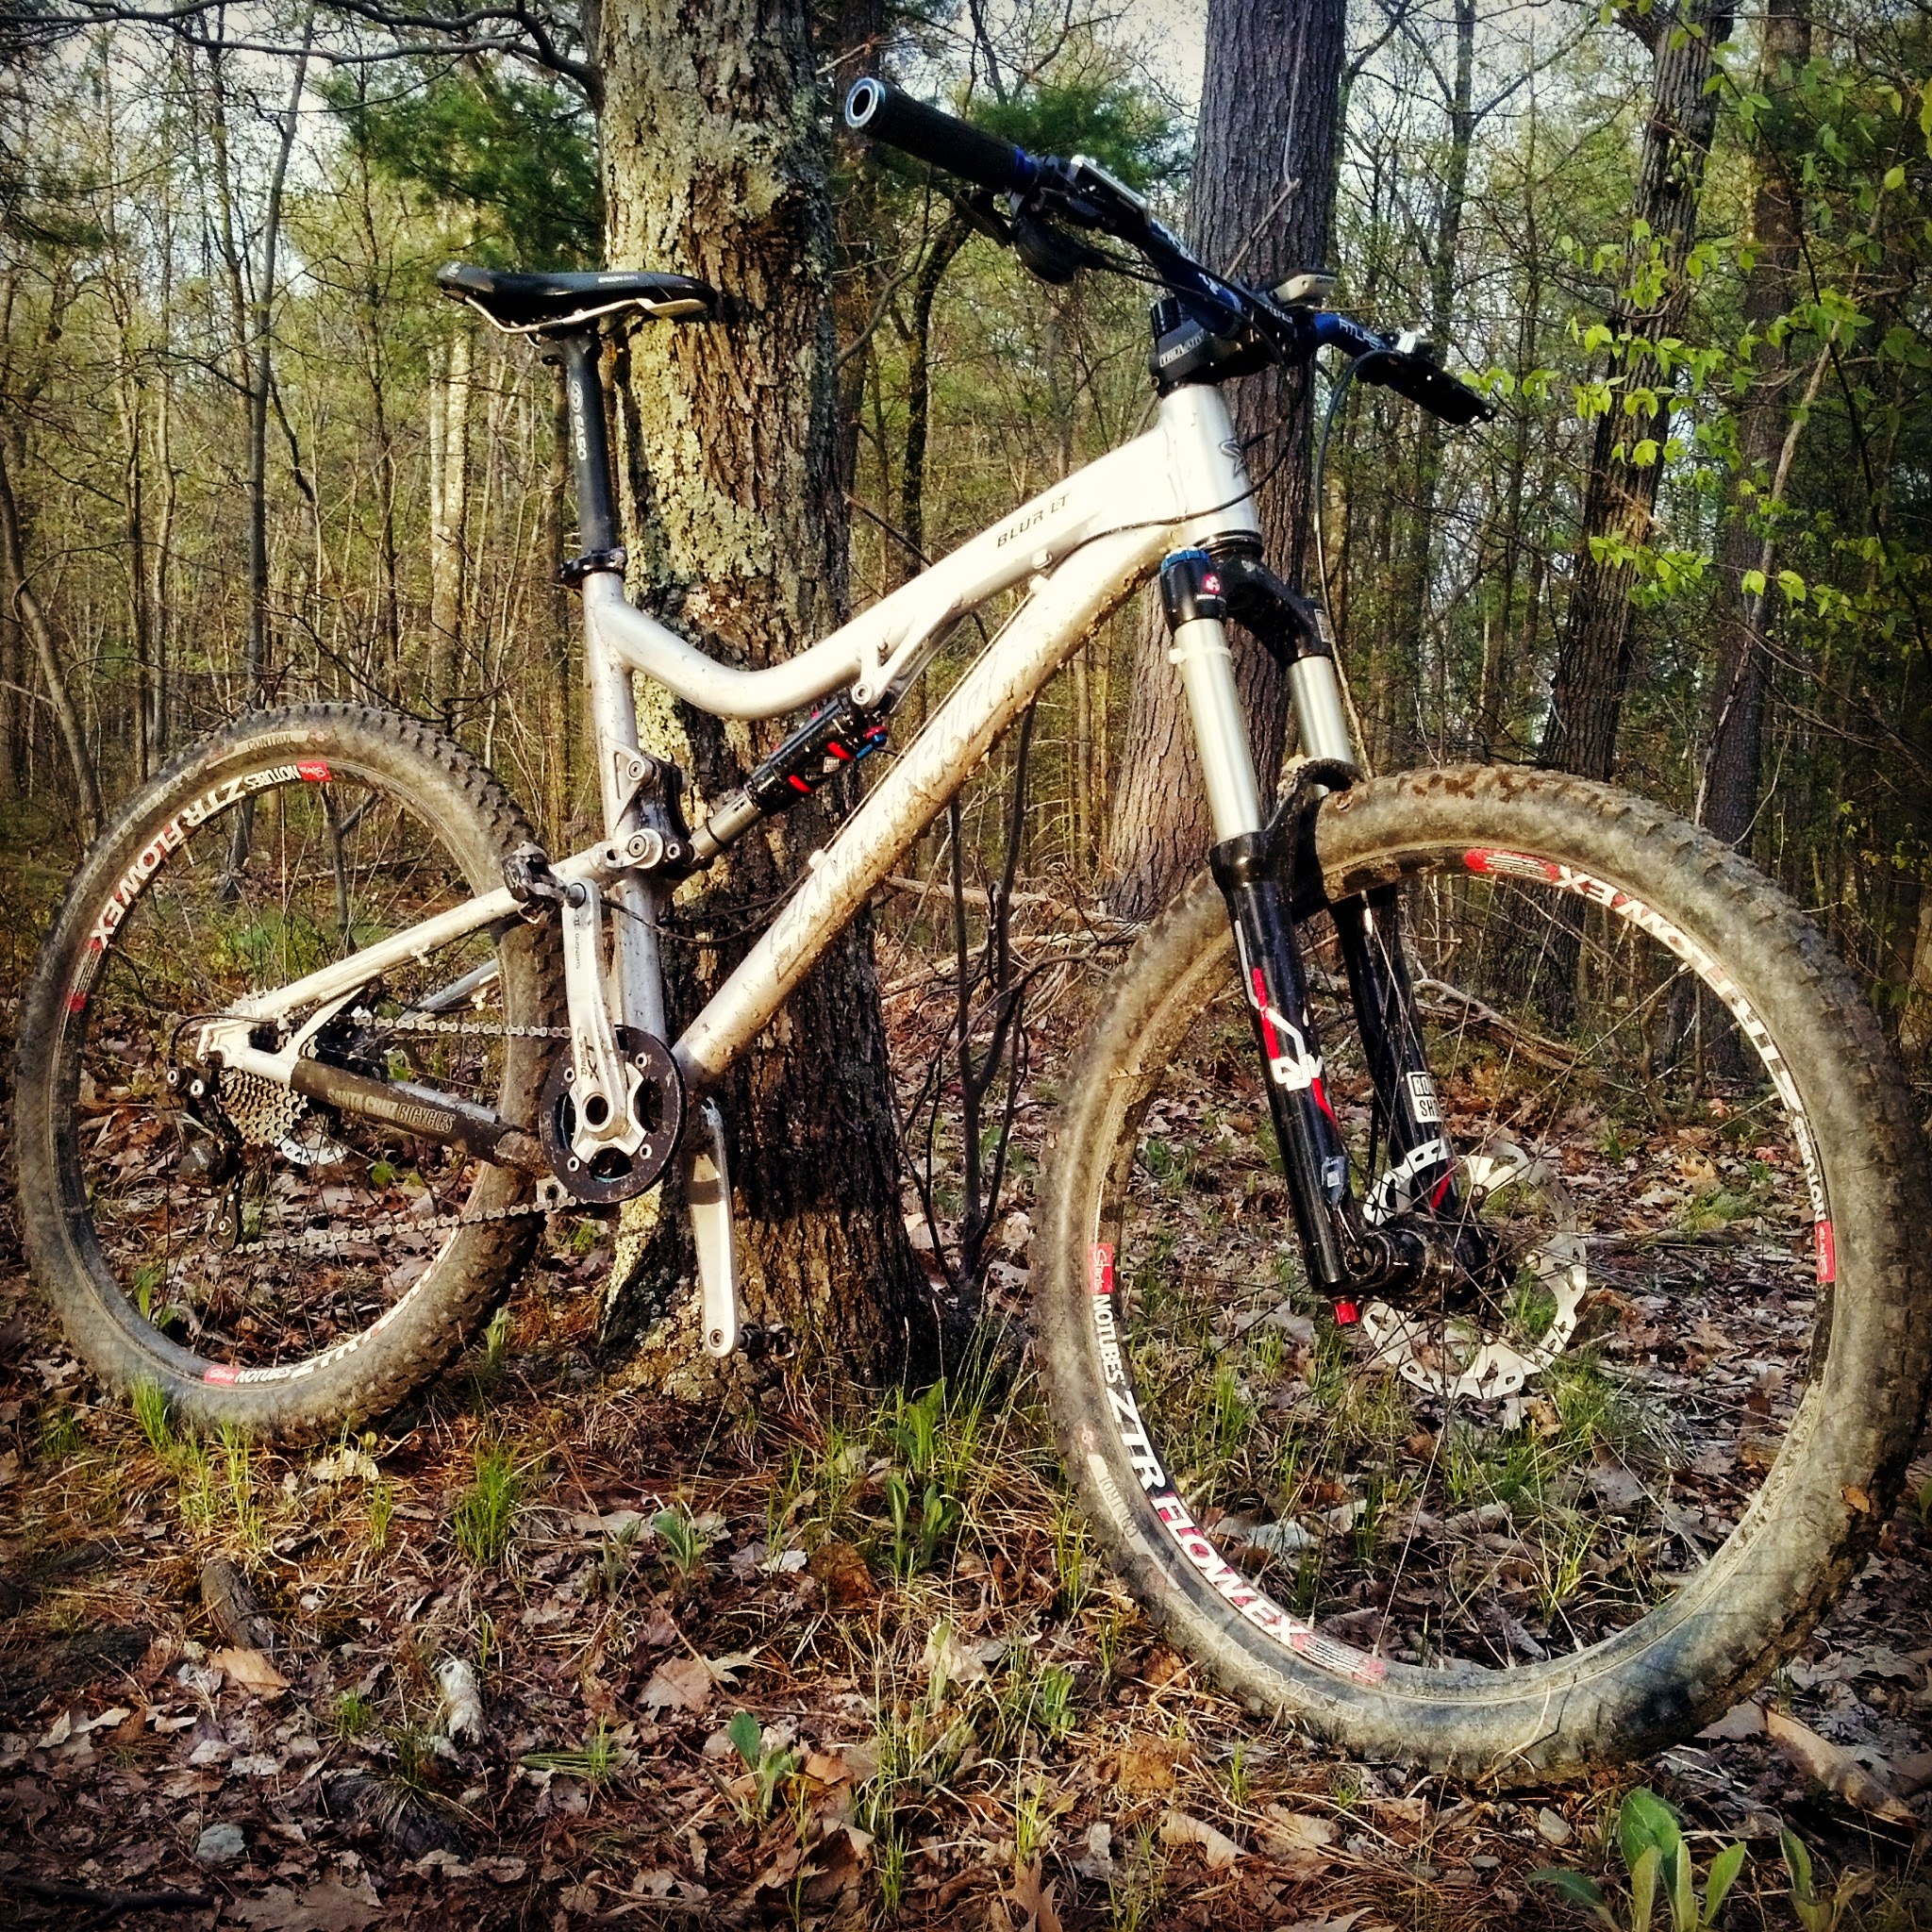
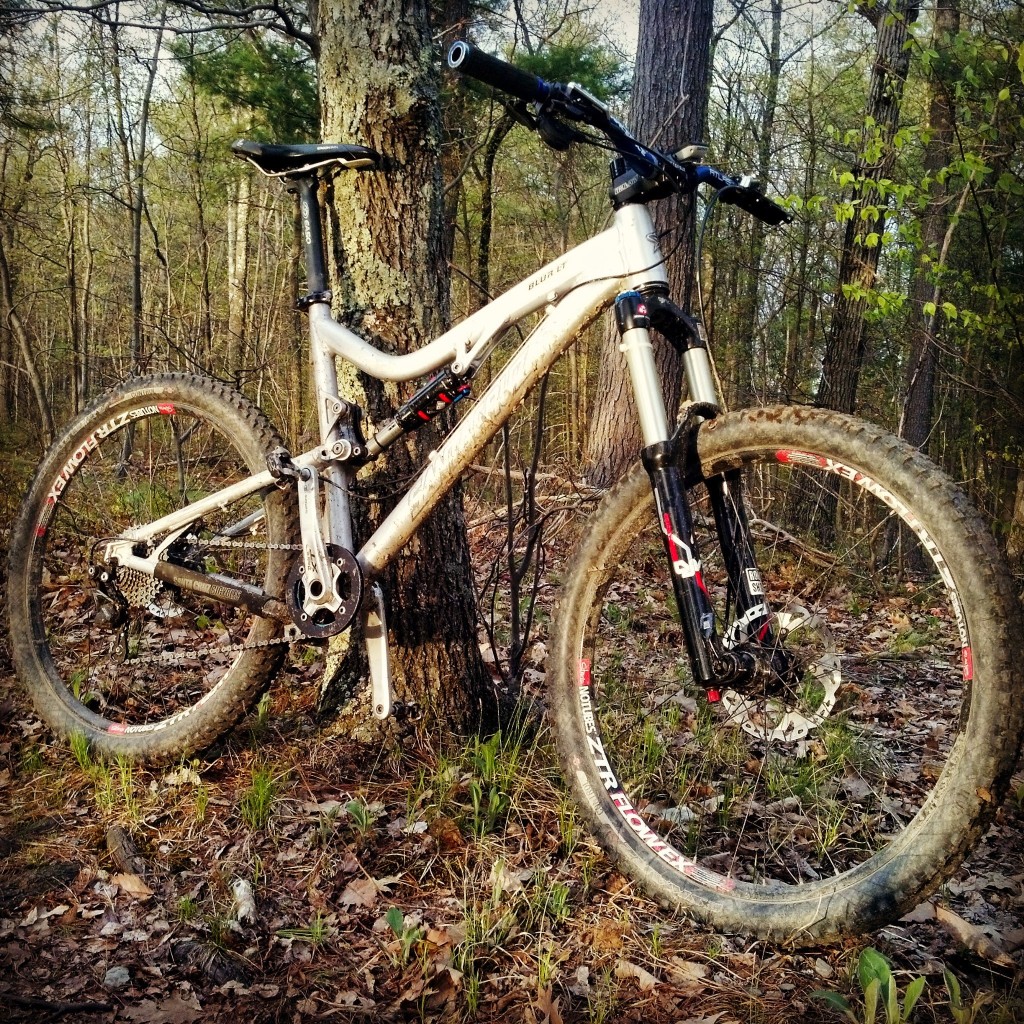
This past year I started riding a Santa Cruz Blur LT. Lots of cool things to love about this bike, but in this post I’m going to focus on the suspension bearings. The pivots on this bike are designed rather brilliantly, and for how good they are, I haven’t seen Santa Cruz brag nearly enough about it. So here’s my tech write up…
Most full suspension bikes use some sort of four pivot design that typically results in eight or more bearings pressed into the frame connecting chainstays, seatstays, a linkage and the shock to the front triangle. VPP suspension is designed much differently, with a one piece rear triangle and two linkages that hold everything together. The bearings are pressed into the linkages and the whole package ends up being very stiff laterally.
The really cool part about this system is the adjustability. Other designs utilize a cartridge bearing with spacers and a bolt that sandwiches everything together and doesn’t allow for any adjustment. The Santa Cruz system is set up like a cup and cone hub and you can actually adjust the bearing preload. Photos follow…
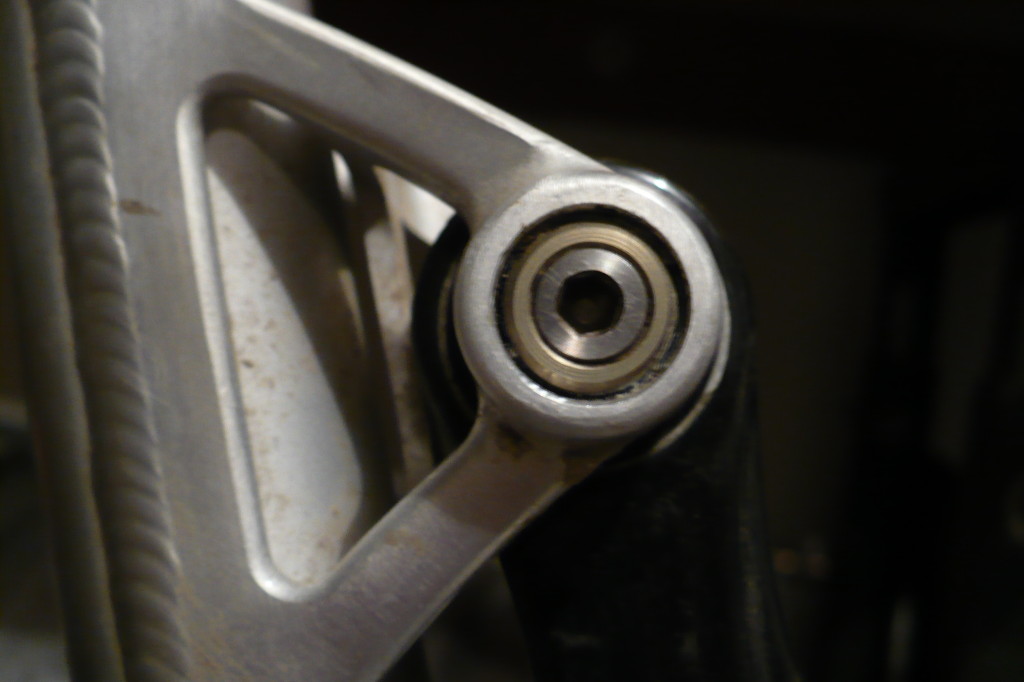
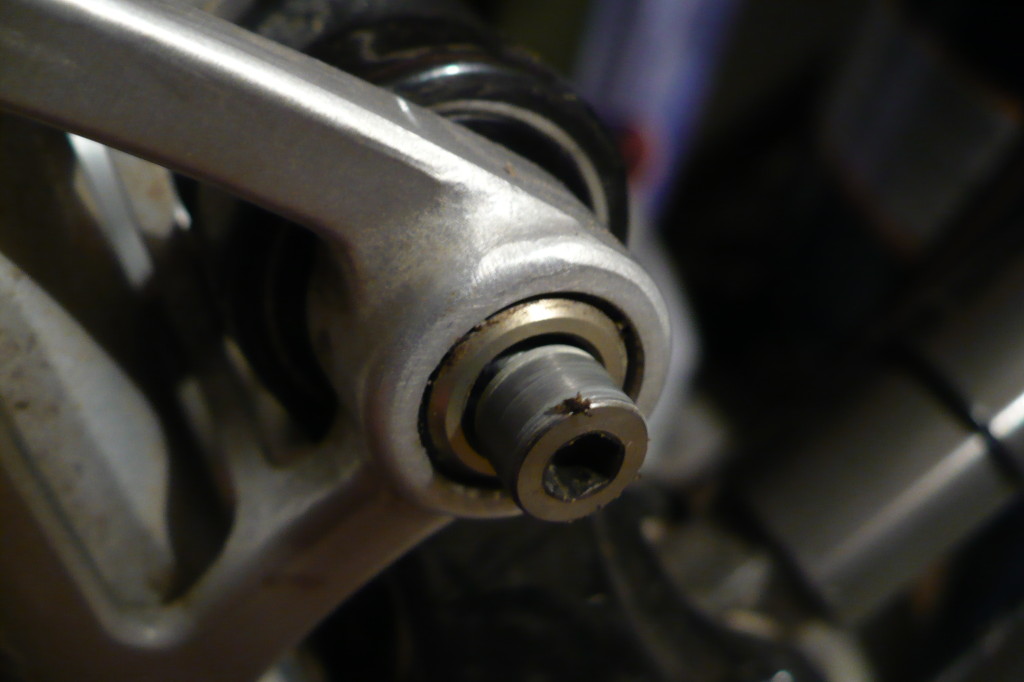
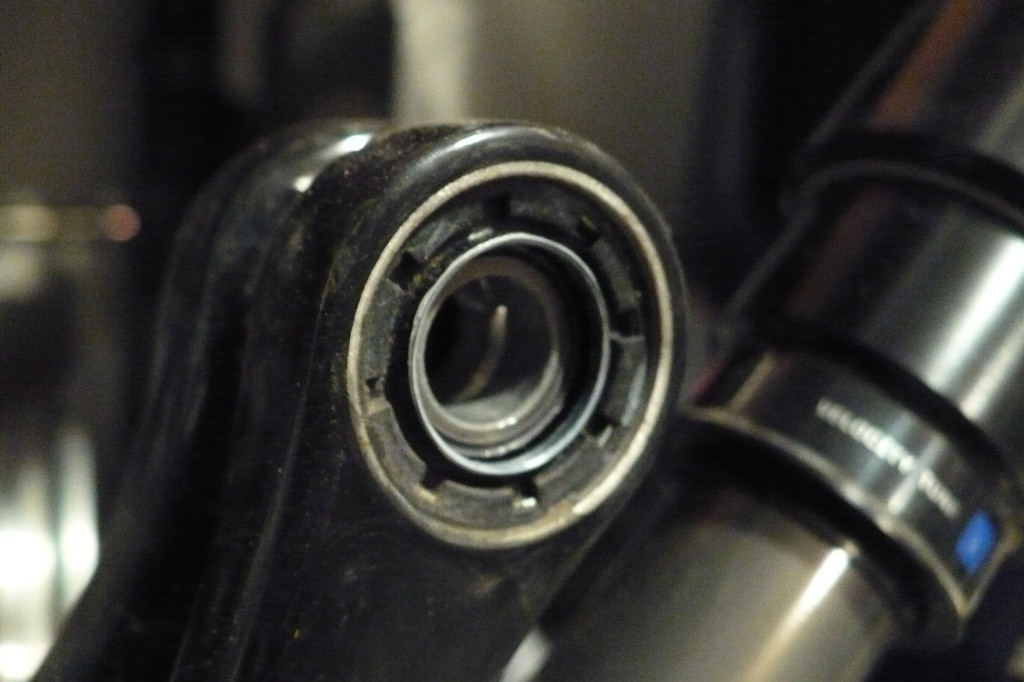
This is how the pivots appear on the surface. On other bikes, if you have a loose pivot, you check torque on the bolt and that can tighten it up. Not so here. You can crank down on that bolt until it snaps, but if the pivot axle is loose, it won’t help at all. So let’s go in depth.
Loosen the bolt and remove it.
The gold-colored washer behind the bolt has an allen head in it, but it isn’t actually threaded into anything. You can use an allen key to turn in and pop it out of the pivot axle. Notice how it tapers down.
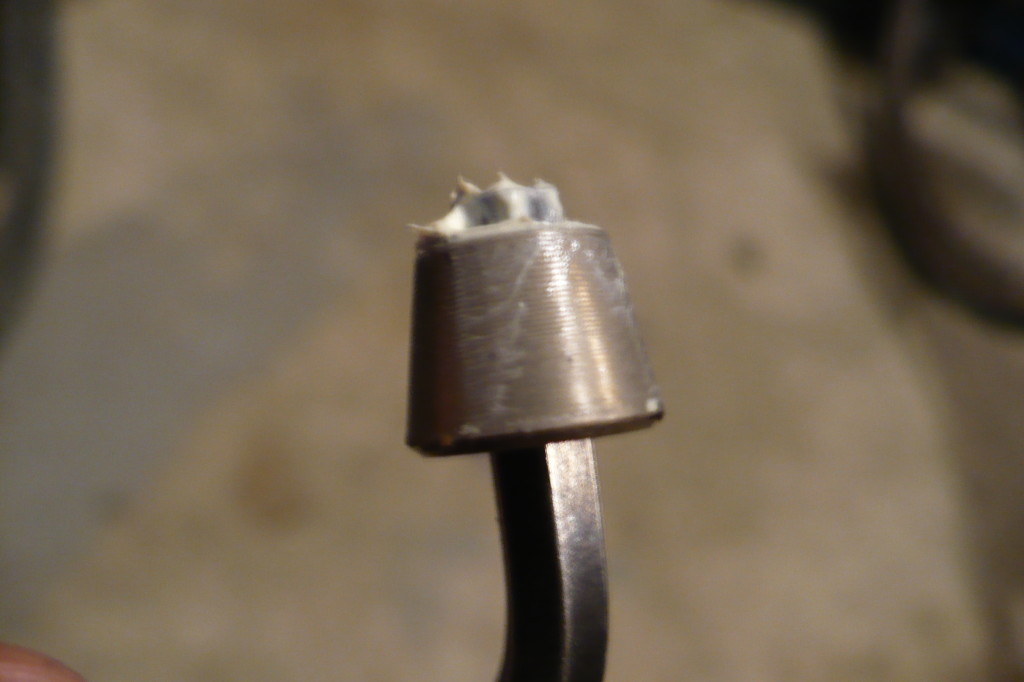
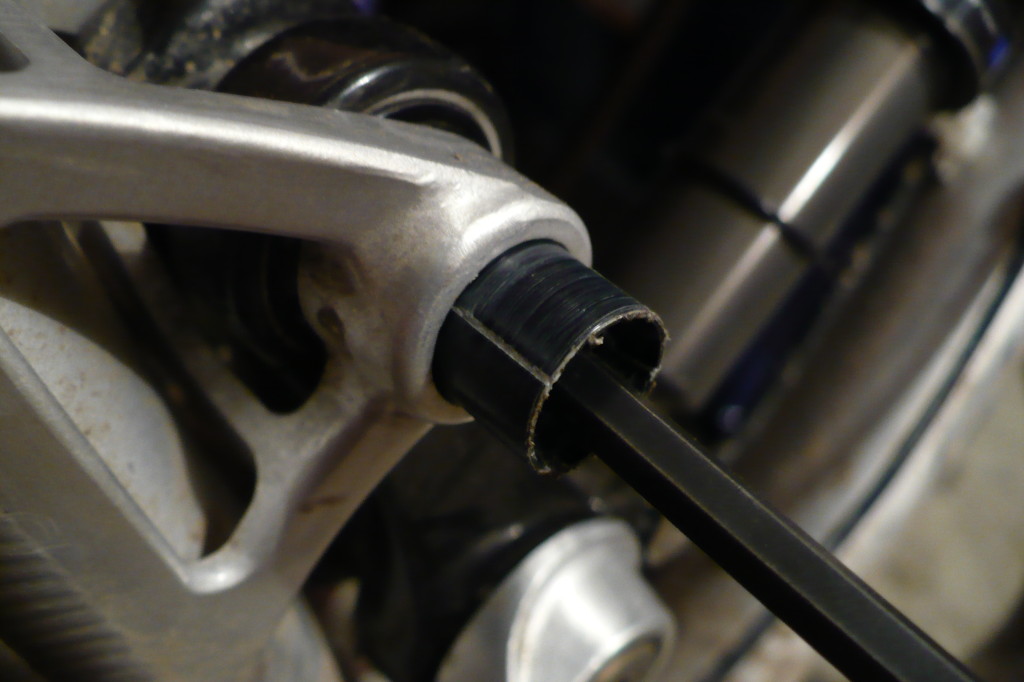
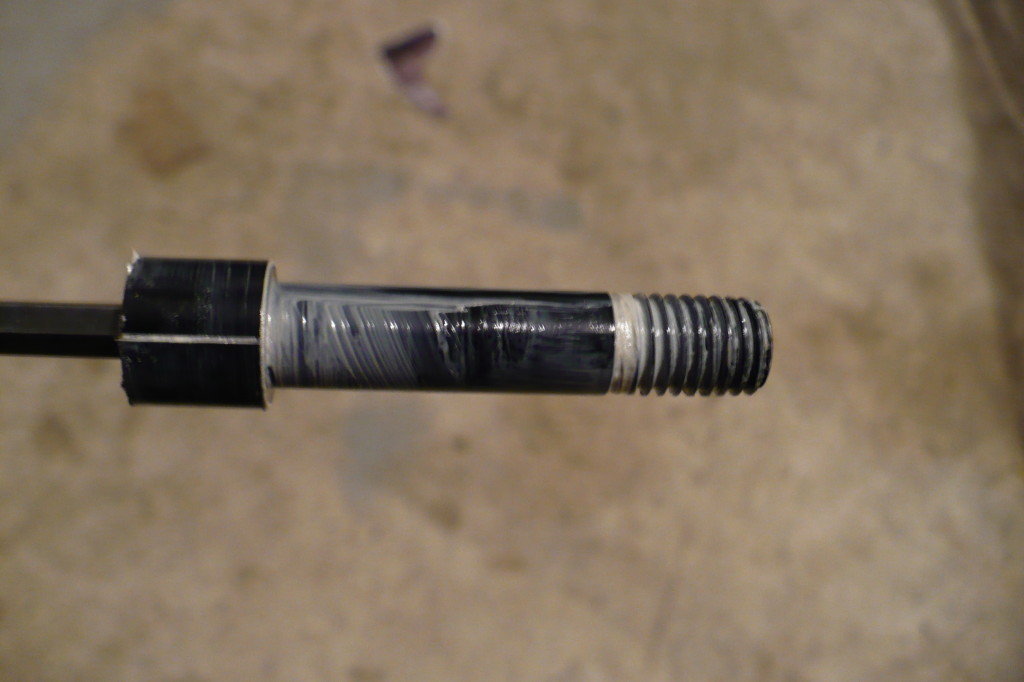
Now you can un-thread the pivot axle. The pivot axle threads into the frame and tightens up on the bearings. Notice how the end of the axle has four vertical slits in it. The conical washer tightens into these and expands them, locking the pivot axle in place so it can’t loosen or tighten. Brilliant!
The bearings themselves are open on one size and have a removable cover that lets you re-grease them. The idea is that this system is so easy to rebuild that you can do it more frequently and the bearings will last longer.
The upper link in its entirety. All the bearings are pressed into here, so if you do need to replace them you just unbolt the link and press them out in a vise. No need to awkwardly do it on the bike stand or remove chainstays, seatstays, etc.
You’ll notice everything in my photos has grease on it. Grease it up thoroughly or you can get some wicked creaking. Once lubed up however they’re nice and quiet.
To reassemble and readjust:
1. Make sure the black bearing cover is in place.
2. Slide the pivot axle into place and thread it in. Tighten until there is no play – SC recommends a torque value of roughly 35 in/lbs.
3. Place the gold washer into the end of the pivot axle, making sure the smaller end is facing the frame.
4. Thread and tighten the allen bolt. M5 bolts should be tightened to 100 in/lbs and M6 bolts to 110 in/lbs.
5. Ride!
Last Thursday I finally had the opportunity to ride Burro Down with a good friend of mine, John (JPE182 on the MTBR forums). John’s been living in Moab for two years, and has a second job working part time as a mountain bike tour guide for Rim Tours. He tells me the locals call this ride Burro Down, so I refer to it as that. He and I go several years back – we met in college and worked to grow a fledgling mountain bike club – Oneonta State Mountain Biking in Upstate New York. Since he lives in Moab and I have another year of school, we don’t see each other often and we get to ride together even less. Even riding a crappy trail with John is fun, but fortunately that wasn’t the case here. Anyway, enough of the sentiments. On to the goods!
I rode LPS/Porcupine Rim last year and loved it, so I knew a little bit of what I was in for. Our day started at 6am. We loaded the bikes up and dropped my car off at the bottom of Porc Rim. Then we headed north out of town and drove up into the lush La Sal mountains. We unloaded our gear, and hit the trail at 8am. It was a chilly 53 degrees in the mountains.
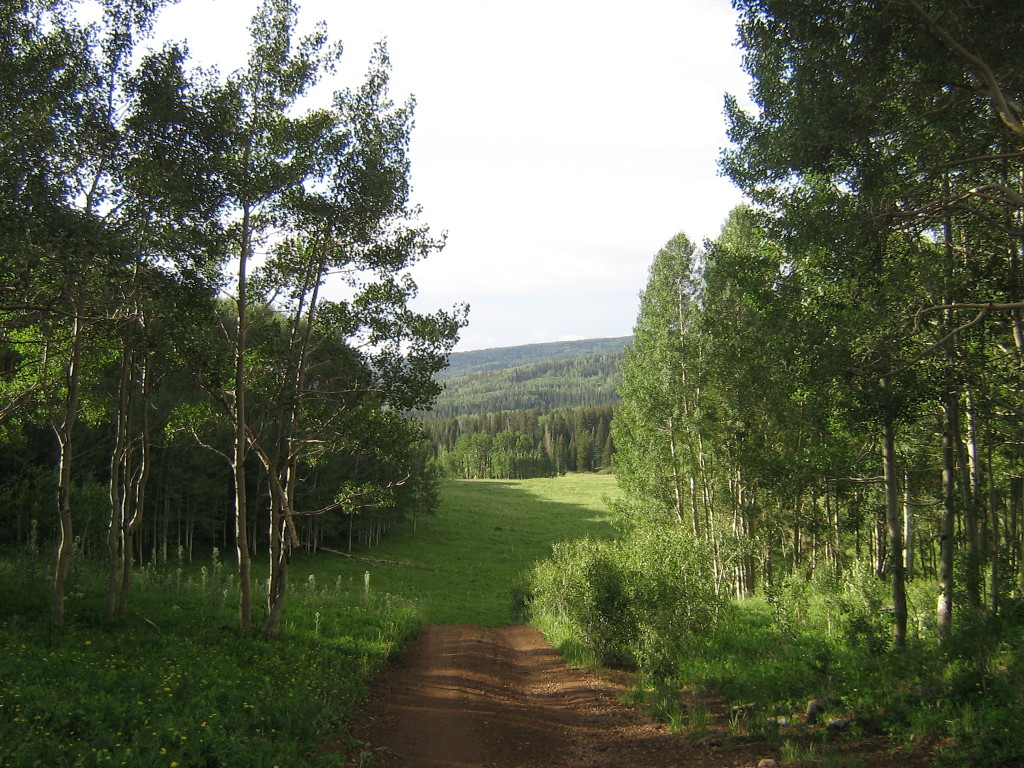
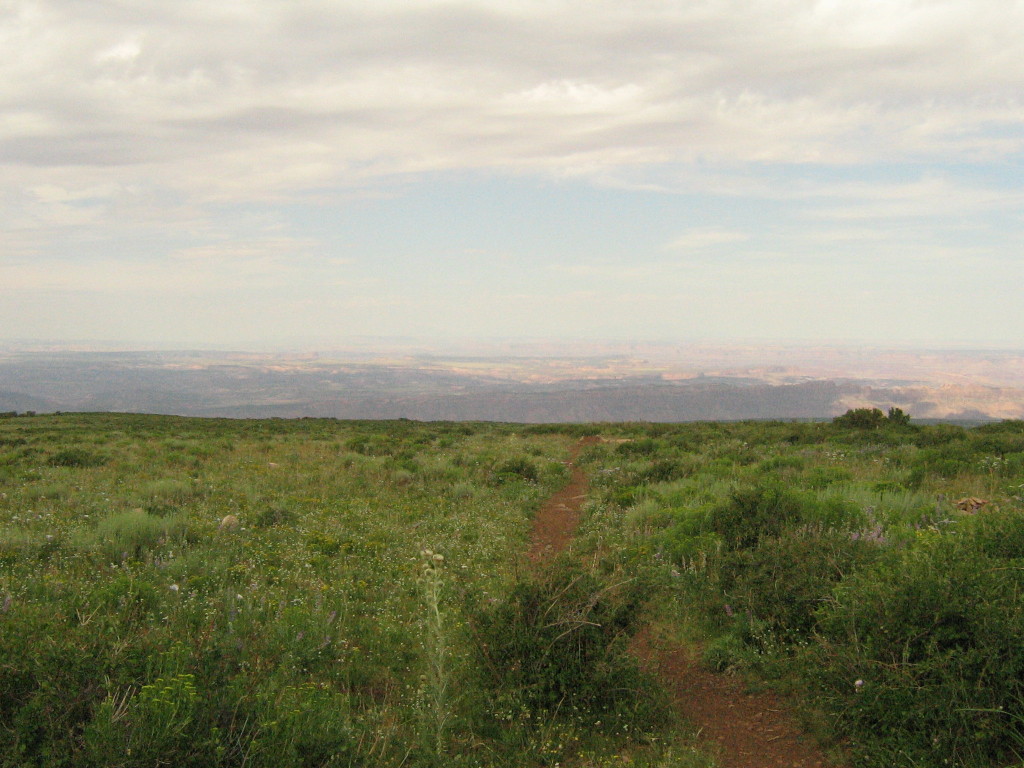
Burro Down starts at about 10,000ft with a couple miles of fireroad. The fireroad quickly gives way to singletrack and you climb a little more until you peak at 11,200ft. It had rained the night before which left the trails nice and tacky. Maybe too tacky in some spots. We rode through pines, aspens and lush green meadows until we hit the top and stopped to gear up for the downhill.
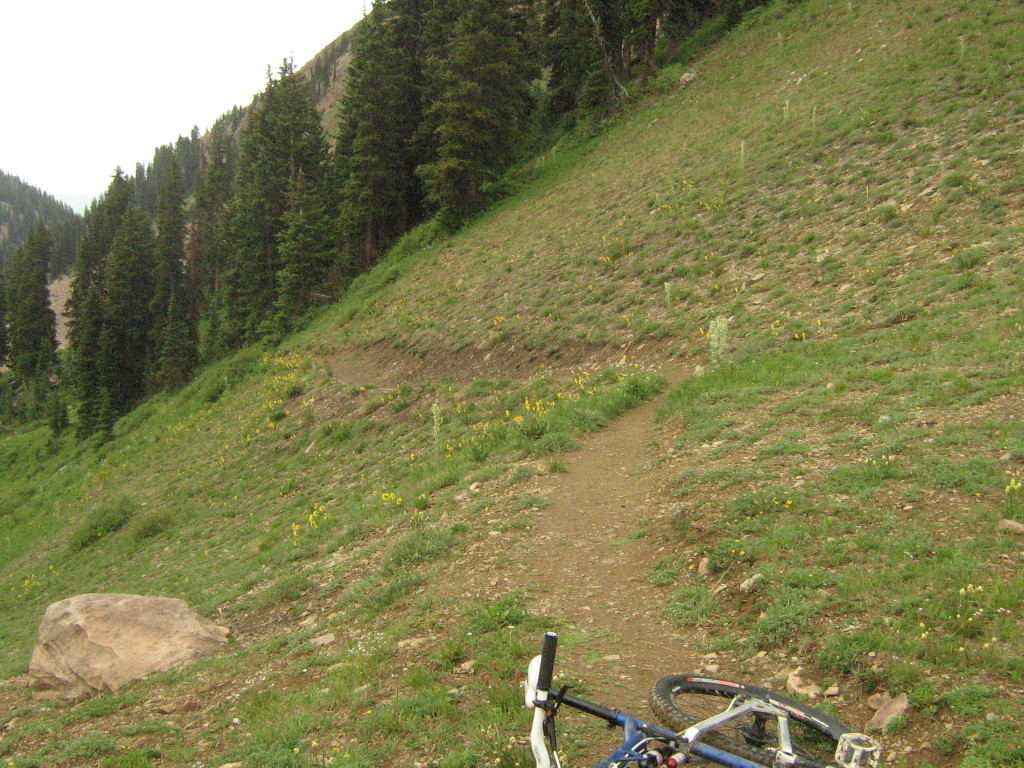
Once the initial climb is over, the rest of the ride is mostly downhill. There’s some climbing interspersed, but not much. There are some switchbacks at the top that are rather tight, steep and loose. We rode a couple, and walked several on account of how wet it was. We ripped downhill on pure narrow singletrack, weaving in and out of the woods and meadows, through stream crossings, rolling over rocks and roots, some still slick from the previous night’s rain. This is my favorite type of riding, reminiscent of the trails back east but on a much grander scale. The clouds that were present when we started soon gave way to midmorning sun and as we rode down, the temperatures rose up.
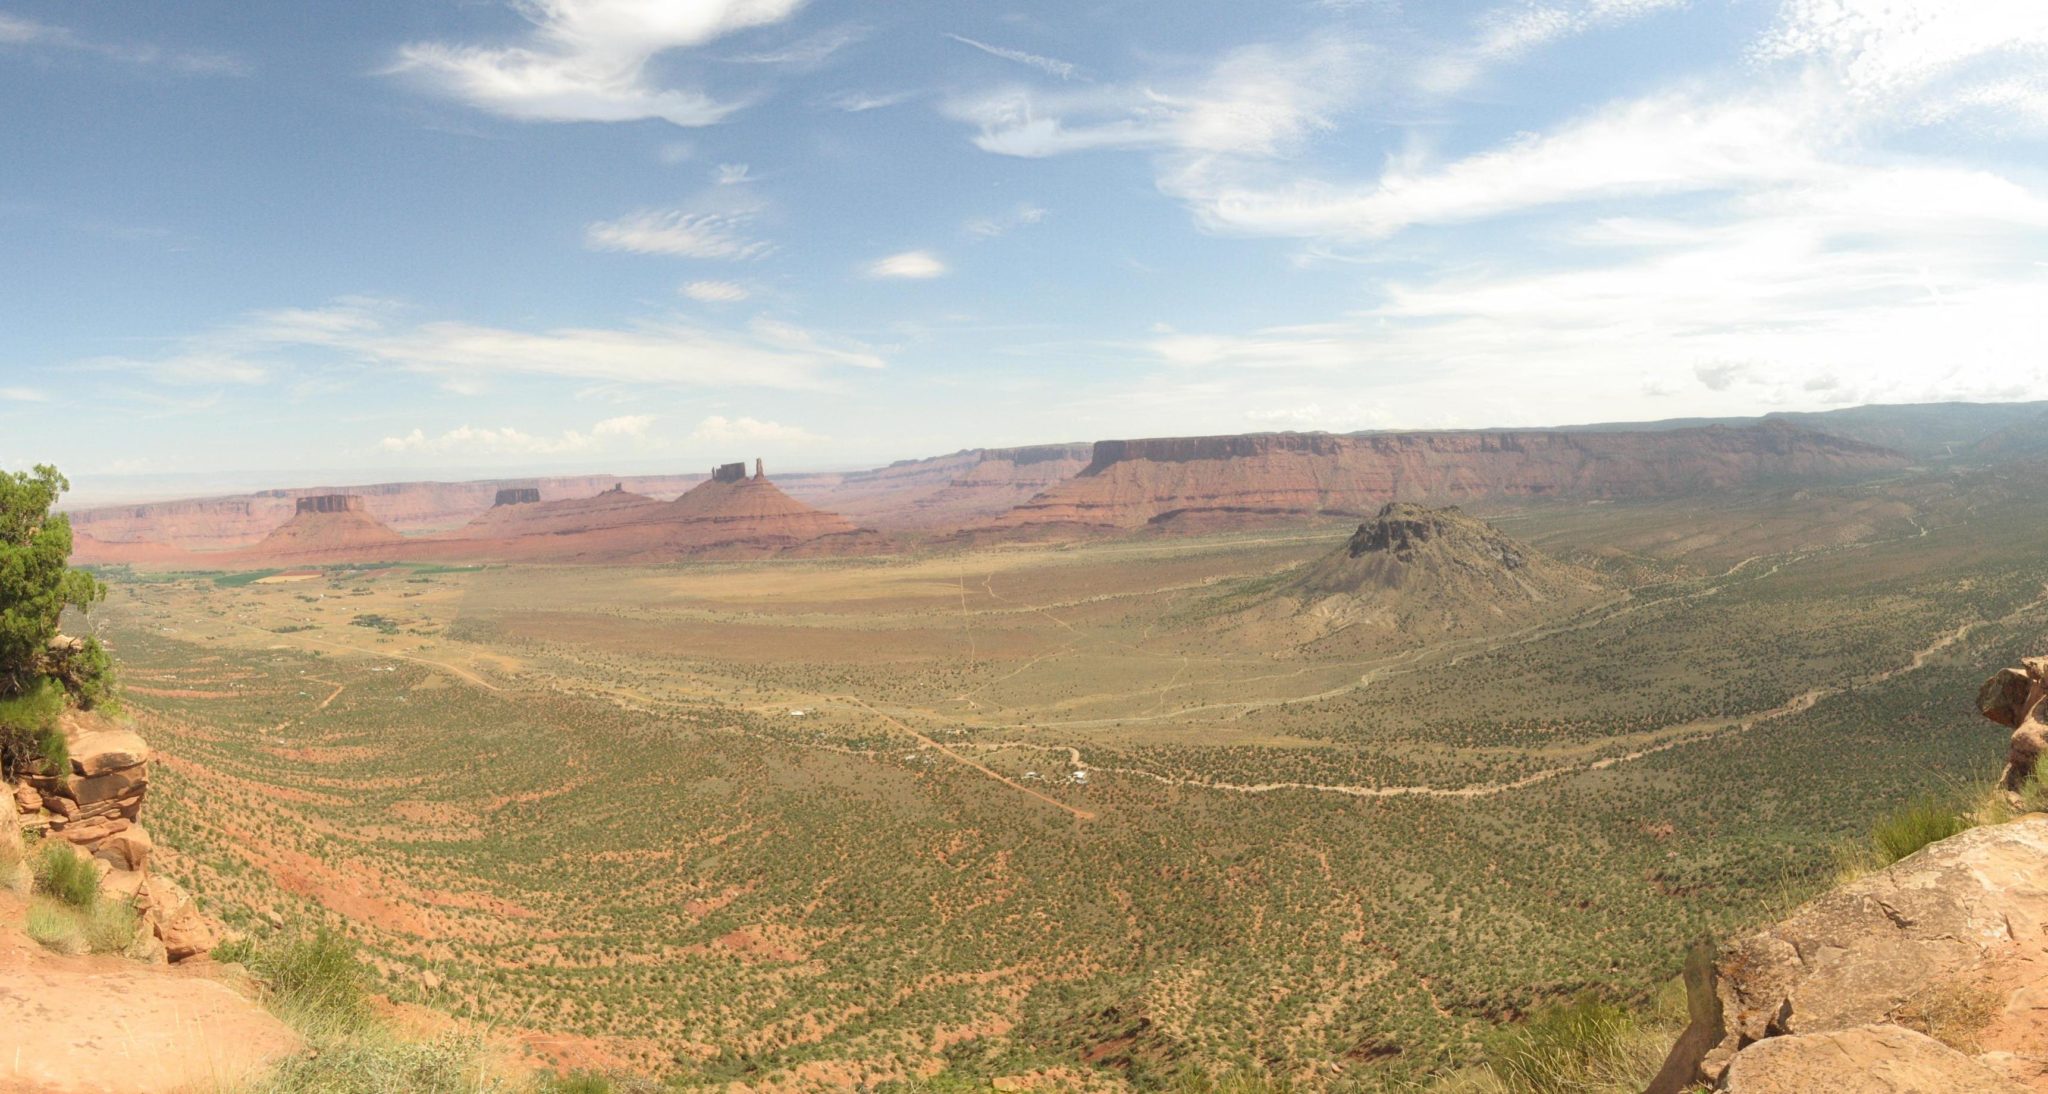
We soon entered Hazard County, passed Warner Lake and emerged into fields that seemed situated on the top of the world. There are numerous jumps and kickers here – be careful, some of the landings are less than ideal and the penalty for coming up short could leave you in a bad place. The trail gnomes had been at work as we blasted through fresh berms of loose soft dirt. Once these are ridden and get some more sun, they will be even FASTER!
As we descended further and further the picture taking became more scarce. It was warming up rapidly and we were having too much fun to stop. We reached Kokopelli soon after and the terrain changed from mostly buff singletrack to dry, dusty fireroad. Surprisingly, this was just as entertaining. You pick up speed really quickly and there are constant undulations you can jump off of. Before I even knew it we had reached UPS.
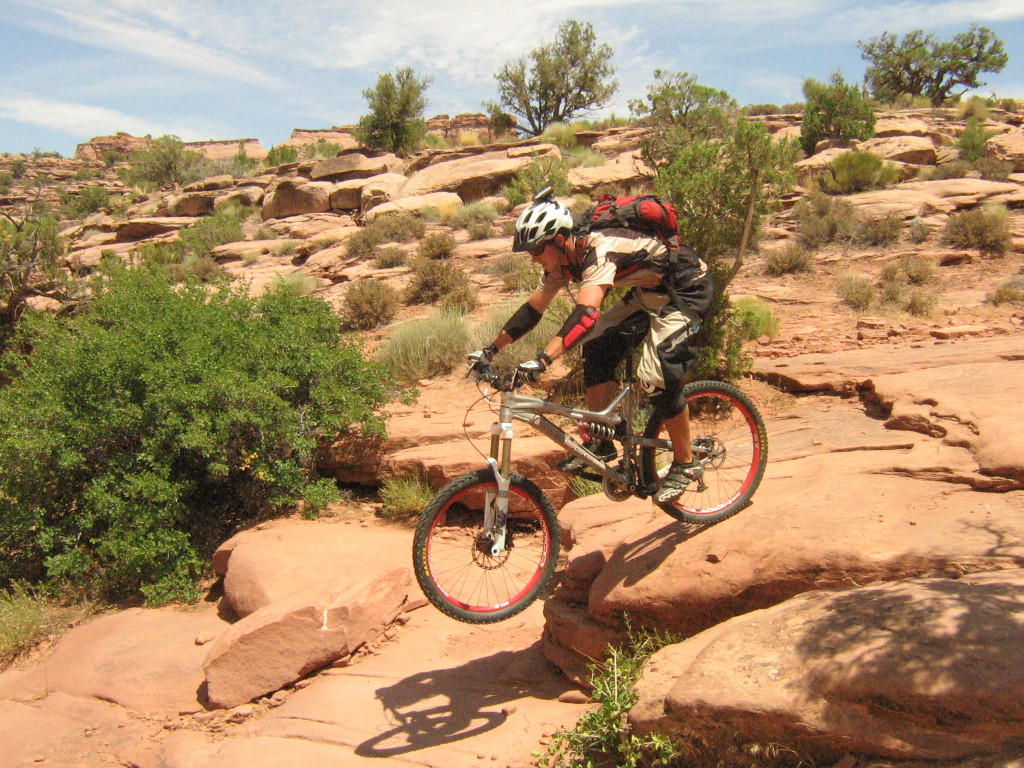
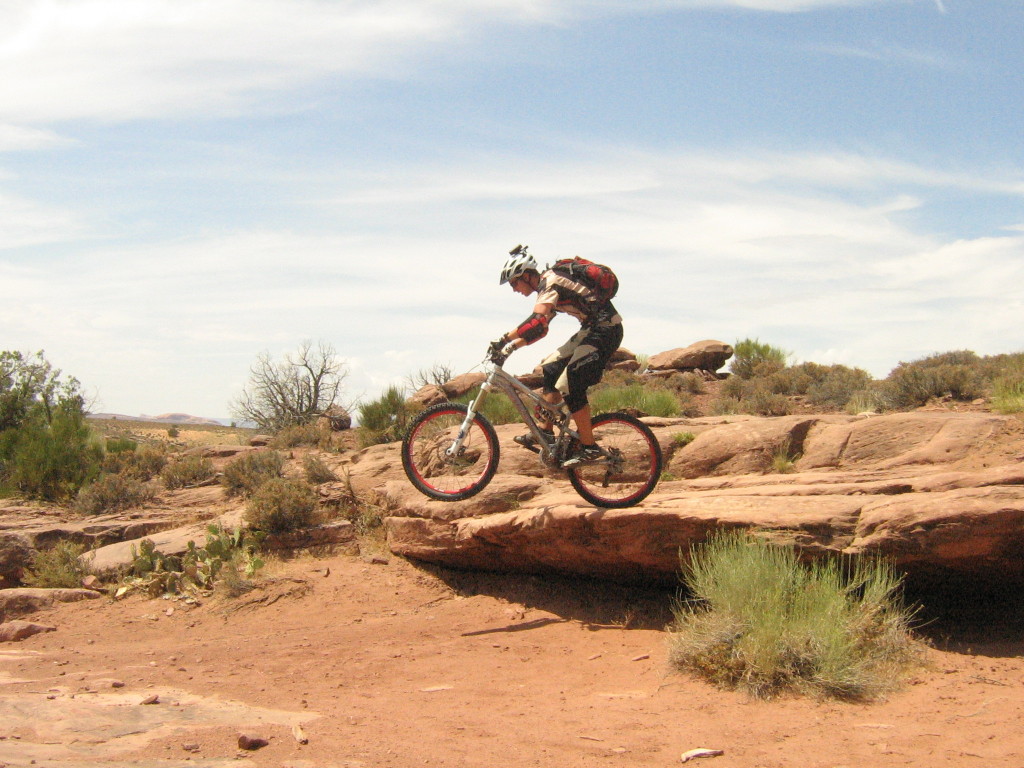
From here, you continue descending and the terrain changes back to full on desert conditions. We got into a great rhythm – part of the reason I like riding with John – our riding abilities are closely matched. We would trade off leading, each of us picking a line and the other following it. We cleaned most sections, with the notable exception of the notch bypass, which is almost as gnarly as the notch itself! I noticed how much my skills had improved from the year before when I played hike a bike on sections that I didn’t even think about this time around. That revelation built my confidence and put me in a great mood. Riding my own bike (instead of a rental) certainly helped too.
As we continued on, we didn’t stop at all. It was HOT and we wanted to finish up as quickly as possible. We did stop briefly to session a couple drops, and managed to make up for a lack of photos with some helmet cam footage. I need to find a good video editing program to process them a bit, but they’re not bad as-is.
The end of the ride saw a trip to Milt’s for burgers (I had the Western BBQ Bacon cheeseburger ) before picking up the shuttle car. The GPS data says 26.5 miles of riding, with 2,410ft of climbing and 8,468ft of descending (sounds about right). Max elevation = 11,126ft, min elevation = 4,041ft. End temperature? 95 degrees easily, probably closer to 100.
If you mountain bike and you have a pulse, this is pretty much a must do ride. I hear it’s awesome in May or September, but July wasn’t all that bad if you get an early start. Bikes? We bombed it on big 6″ rigs (me, a Chumba XCL; John, an Intense Tracer VP) and IMO, that’s the way to do it. Check the elevation numbers again and you’ll see why. Some sort of armor is recommended, especially given the conditions we dealt with. There are a lot of rocks…everywhere. Fortunately we didn’t have any real crashes, or mechanicals – one flat tire….*ahem*…not mine!


 ) before picking up the shuttle car. The GPS data says 26.5 miles of riding, with 2,410ft of climbing and 8,468ft of descending (sounds about right). Max elevation = 11,126ft, min elevation = 4,041ft. End temperature? 95 degrees easily, probably closer to 100.
