Creating a Google Search Console profile is actually quite easy, with the possible exception of the pesky verification part. Nevertheless, it’s not that difficult, and I’ll show you how to do in record time. There are 5 ways to verify a Search Console profile. Your site configuration, tracking setup, user permissions, etc. will determine which one is best for you. I’ll explain them all here, starting with my preferred methods. If you’re doing this on WordPress, skip to the bottom of the post, I’ve got specific instructions just for you.
Google Analytics
Google Analytics is a fairly easy option, assuming three things:
- You’re using asynchronous (analytics.js) tracking code.
- Tracking code is placed in the <head> section.
- You have ‘edit’ user permissions.
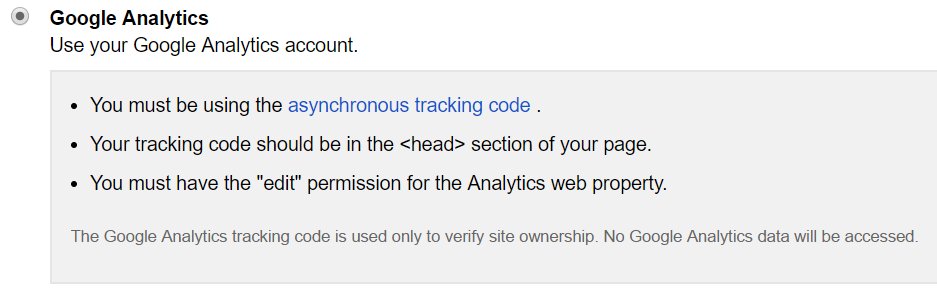
If any of these three things raises a red flag, the GA verification option is not for you. If you pass the criteria, click the red Verify button and you’re off to the races. If you’re using Google Tag Manager, this method is a no-go, but you can use the GTM method in the paragraph after this.
Google Tag Manager
If you’re using Google Tag Manager, you can’t use the GA method, but there’s an option specifically for you. Needless to say, there are criteria for this also:
- You have to be using the container snippet.
- You must have ‘manage’ user permissions for that container.
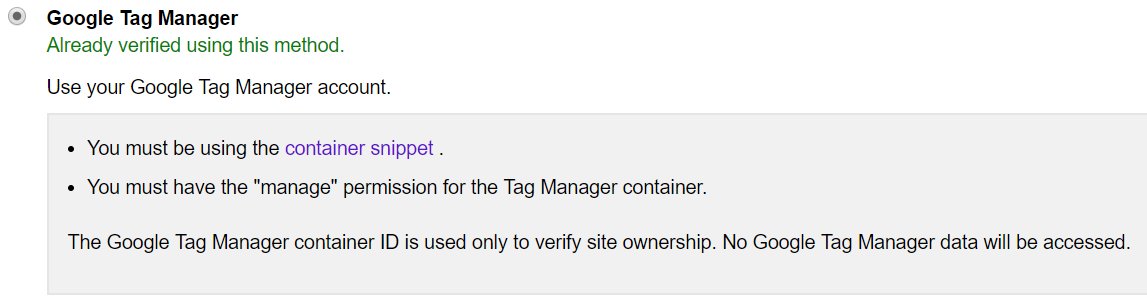
If you don’t fit those criteria, keep moving. If you do, click ‘Verify’ and you’re done.
HTML Tag
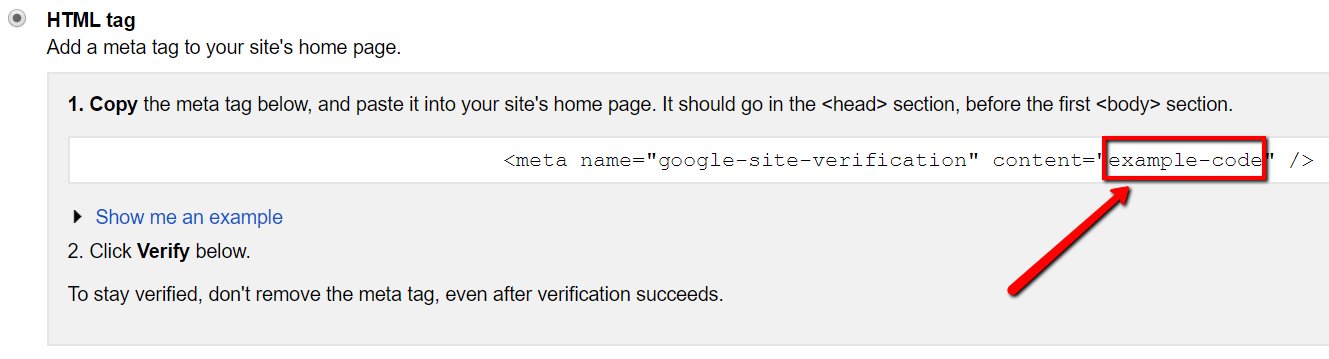
The HTML tag is simply a meta tag (a single line of HTML code) that gets added to the homepage and voila, verifies the site/profile. Depending on the CMS, this may be very easy to do (in WordPress it’s a pinch). You can either do this yourself if you have CMS access, or ask a web developer or marketing manager to implement it. How you do this depends on what CMS you’re using. It’s likely you have a custom HTML field or something similar where the tag can be added. The tag needs to go in the <head> section of the homepage.
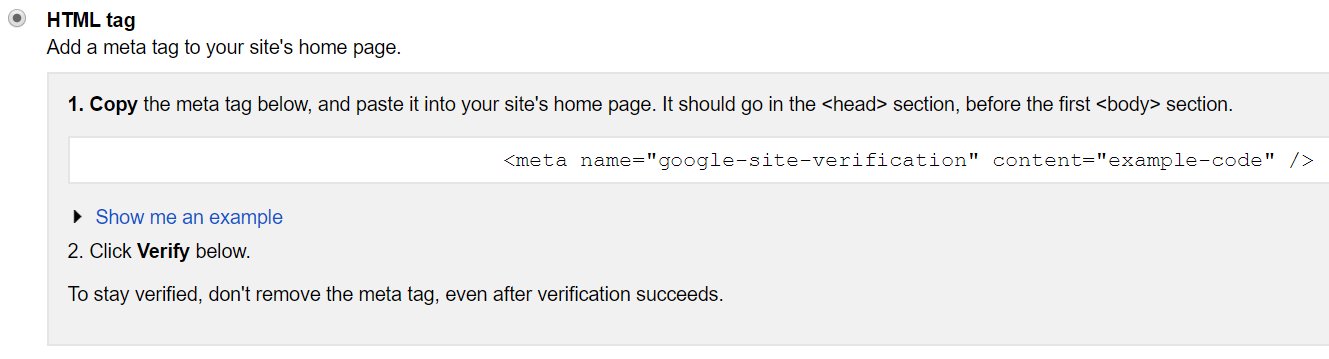
Once you’ve verified it has been added, go back into Search Console and click the big red ‘Verify’ button. Even after you’ve succeeded, leave the HTML tag on the home page, or the property will revert back to unverified status.
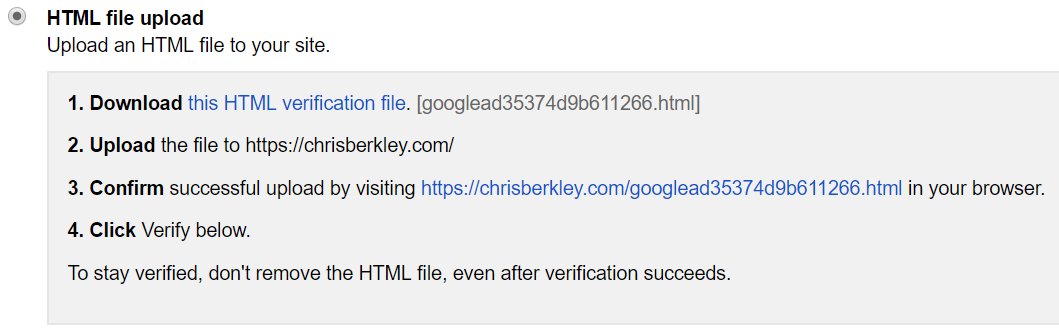
HTML File Upload
The HTML file upload is similar to the HTML tag, but instead of a line of code, you’re adding a small HTML file to the root domain. To do this, you’ll effectively need the ability to add files to the root folder on the hosting provider. FTP access is ideal, but if you’re a marketer, you probably don’t have that. If possible, ask the web developer to add it. Once you’ve done this, visit the URL created by the file to ensure it’s in the root folder and not a subfolder.
Domain Name Provider
This method is listed as Google’s recommended method – possibly because it’s the most secure? In any case, Google will prompt you to log into the provider where you bought your domain name (for example, GoDaddy or NameCheap).
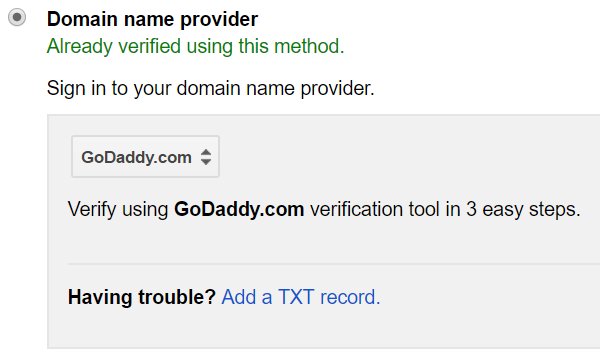
If you have access to the domain name provider – that’s fine. However (and speaking from experience) it’s much more likely that you don’t have access to this, which makes it a moot point. I’ve only used this method to verify a Search Console profile once, and it was on my own site. On the hundreds of other GSC profiles I’ve created over the years, I’ve never had access to the domain name provider. With clients, getting access to that may involve going through a compliance department or IT team, which, as you can imagine, takes far more time than it’s worth. There are simply easier ways!
Search Console/Webmaster Tools Verification on WordPress
If you’re trying to verify Google Search Console or Bing Webmaster Tools on WordPress, you’re in luck, because it’s ridiculously easy. I’ll assume you already have one of two SEO plugins installed. Either A) Yoast’s WordPress SEO plugin or B) All In One SEO Pack. Both are really freaking good plugins and you’re doing yourself a disservice if you don’t have one of them installed on your WordPress site.
Verifying Search Console with Yoast’s WordPress SEO Plugin
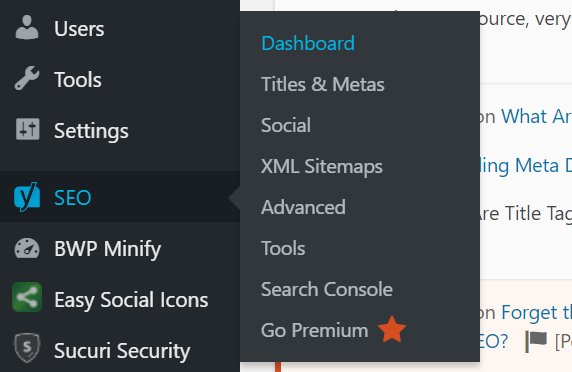
In the WordPress backend, go to SEO > Dashboard > Webmaster Tools. Yes there is also a Search Console menu item. No, that’s not where you actually verify Search Console.
Here you’ll see three different form fields Go back and look at the HTML tag I mentioned earlier in this post, copy the value and enter it here. You can also enter your Bing Webmaster Tools Verification (you have that too, right?)
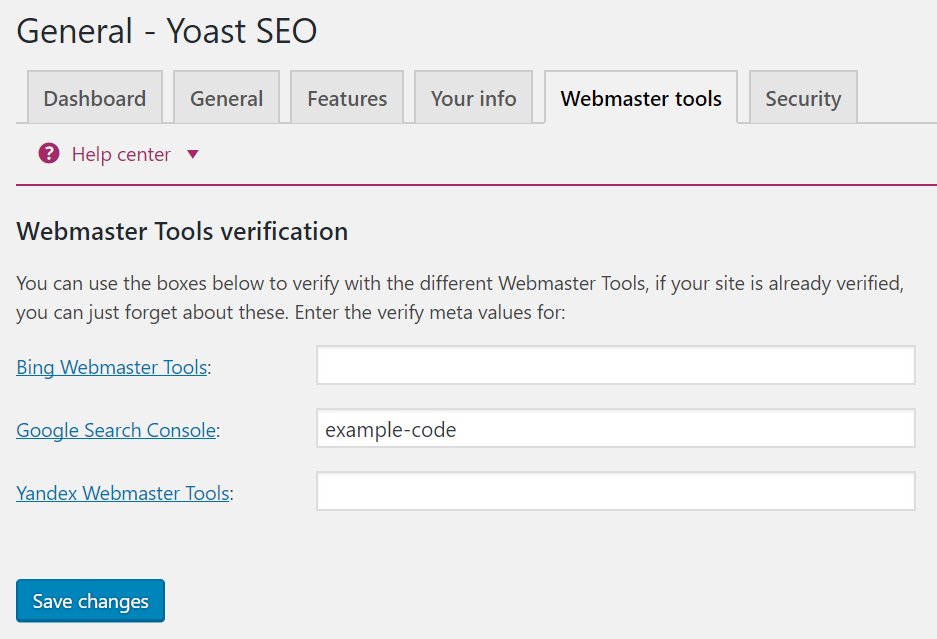
Once you’ve done that, click ‘Save Changes’ then go back into Search Console and click verify (using the HTML tag method).
Verifying Search Console with All In One SEO Pack
For those using All in One SEO Pack, the process is not much different. Go to All In One SEO > General Settings and scroll all the way down to the ‘Webmaster Verification’ section, where you will see the same two fields for Google and Bing Webmaster Tools.

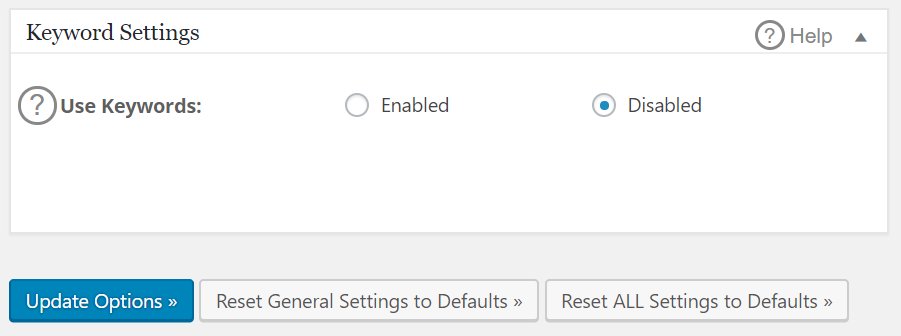
Once you’ve done this, KEEP SCROLLING DOWN. With so many features on one page, it’s easy to miss the ‘Update Options’ button, which is critical to make sure your settings get saved.
That’s essentially it. With 5 different options to verify GSC, you’re sure to find at least one option that works for you, and verifying by more than one option is always a nice failsafe if you have the option available to you. Questions? Comment here or hit me up on Twitter (@BerkleyBikes)
Additionally, don’t forget to setup Bing Webmaster Tools so that you can get the same insights from Bing.
