All Posts By

Chris Berkley

Virtual Event Schema Sample

By Uncategorized No Comments

This is a sample of Event Schema for Virtual Events. The goal is to craft Schema that *may* associate the Virtual Event with an Organization’s Google My Business listing.

<script type="application/ld+json">
{"@context" : "http://schema.org",
"@type" : "Event",
"name" : "Indy Hall Event Number One",
"description" : "This is the first Indy Hall virtual event.",
"url" : "https://www.indyhall.org/events/number-one/",
"image" : "https://www.indyhall.org/media/events/number-one.jpg",
"startDate": "2020-04-23T14:00-4:00",
"endDate": "2020-04-23T15:00-4:00",
"eventAttendanceMode": "https://schema.org/OnlineEventAttendanceMode",
"eventStatus": "https://schema.org/EventScheduled",
"performer" : "Alex Hillman",
"offers": {
    "@type": "Offer",
    "price": "0.00",
    "priceCurrency": "USD",
	"availability" : "InStock",
	"url" : "https://www.indyhall.org/tickets/",
	"validFrom" : "2020-04-23T12:00-5:00"},
"organizer" :
{"@type" : "Organization",
"name" : "Indy Hall",
"url" : "https://www.indyhall.org/",
"address": 
{"@type" : "PostalAddress",
"streetAddress" : "399 Market Street Suite 360",
"addressLocality" : "Philadelphia",
"addressRegion" : "PA",
"postalCode" : "19106"}},
"location" : 
{"@type" : "VirtualLocation",
"url" : "https://www.indyhall.org/zoom/"},
"sameAs" : ["https://meetingplace.io/indyhall/events/0001"]}
</script>


Speaking At WordCamp Philly on October 5th

By Conferences No Comments

I’m excited to announce that I’ll be speaking at WordCamp Philly on October 5th! WordCamp Philly is a single day conference for WordPress experts and enthusiasts to come together and listen to presenters talk about innovative ways to use WordPress.

My session will focus on How To Get The Most Out Of Yoast. I will discuss how to use the Yoast SEO plugin effectively in order to get the most out of it and maximize your site’s SEO potential using the plugin.

SEO Crawlability vs. Indexation vs. Ranking

By Uncategorized No Comments

Crawlability, indexation and ranking are often confused, and while they relate very closely, they mean very different things. Before ranking can happen, crawling and indexing has to occur, and that’s why technical SEO is so important.

Crawlability

Crawlability is at the core of SEO. When a search engine crawler like Googlebot or Bingbot accesses a website, they crawl it to find all the pages, images, links, CSS and Javascript files, etc. By definition, crawlability is the ability of search engines to find and access website content.

If a search engine can’t access website content, then neither indexation nor ranking are possible. Those things rely on search engines being able to crawl the content in the first place.

Changing Crawlability with Robots.txt

Robots.txt is the most common method to prevent search engines from crawling a website. If a specific URL or subfolder is blocked in robots.txt, search engines will not crawl it. That means links on that page won’t be discovered, and entire site sections might not be discovered (that’s why it’s important to have an XML and/or HTML sitemap – redundancy!)

In this example, robots.txt is being used to block search engines from crawling pages that fall in the /properties/listing/ subfolder on a real estate website.

User-agent: *
Disallow: /properties/listing/

Blocking Crawlability

Sometimes content is prevented from being crawled inadvertently. If content is rendered with Javascript, this can sometimes be problematic, although changes to Googlebot will now allow it to better crawl Javascript than ever before.

Additionally, if links are using a nofollow directive, that may present issues as the nofollow attribute instructs Googlebot NOT to follow links. However, there’s debate about how Google really handles nofollow links, with some claiming that Google does crawl them, but doesn’t give them any link equity.

Indexation

Once content has been crawled, it’s up to search engines to decide whether to index that content. If the content is duplicated or plagiarized, then search engines may choose to crawl it, but not index it. Similarly, thin or low quality pages may fall victim to the same fate.

Preventing Indexation

You may choose to intentionally prevent search engines from indexing content using a noindex directive. However, search engines still need to crawl that page in order to see the noindex tag. If you want to noindex a page, you have to let it be crawled first. Sometimes a noindexed page will be stuck in the index because it’s blocked by robots.txt and therefore Google cannot see the noindex directive after it’s been added.

Common types of pages that might be noindexed include tag & category pages (common on WordPress). These pages are valuable in that they automate creation of internal links, but they aren’t great for search since they have primarily dynamic content and aren’t optimized well for organic search. I typically recommend noindexing tag & category pages.

Ranking

Ranking is the last step in the process. A page can get crawled and indexed, but not rank well at all. In a competitive space like retail and eCommerce, there are hundreds of websites trying to rank for the same keywords and only 10 will end up with page one visibility.

Improving rankings relies very heavily on A) the on-page content and B) overall site authority and off-site (linking) efforts. Ranking is usually the most difficult part – assuming there aren’t glaring technical issues on the site, crawling and indexation are a lot easier.

Summary

To summarize: rankings rely on crawling and indexation, in that order: Crawling > Indexing > Ranking.

Want more SEO and Analytics content?

Subscribe to my email list

Speaking At WordCamp Philly on October 27th

By Conferences No Comments

I’m excited to announce that I’ll be speaking at WordCamp Philly on October 27th! WordCamp Philly is a single day conference for WordPress experts and enthusiasts to come together and listen to presenters talk about innovative ways to use WordPress.

My session will focus on Using Data & Research For Website Planning. I will discuss the importance of planning ahead, and how you can build a content strategy using commercially available tools and your own existing data. I will also discuss technical aspects including content structure, the hub and spoke model, URL hierarchy, site organization and more.

Download Slides

How Does Google Treat Subdomains For SEO?

By SEO, Technical SEO 14 Comments

Time and time again, Google has shown that they treat subdomains very differently from root domains, in some cases treating them as completely different sites. For SEO purposes, it’s generally recommended to use a subfolder instead of a subdomain.

Subdomain vs. Subfolder

A subdomain is a string of characters that precedes the root domain and uses a period to separate them. A subfolder comes after the domain suffix and is separated by a forward slash. You can have multiple subdomains or subfolders, and you’ll frequently see them combined.

Examples:

  • Blog.chrisberkley.com is a subdomain
  • Chrisberkley.com/posts/ is a subfolder
  • Blog.chrisberkley.com/posts/ is a subdomain with a subfolder.
  • First.blog.chrisberkley.com is two subdomains (“first” and “blog”)
  • First.blog.chrisberkley.com/posts/recent/ is two subdomains (“first” and “blog”) with two subfolders (“posts” and “recent”).

Did You Know?

In the URL www.chrisberkley.com, “www” is technically a subdomain. It’s true!

Why Use Subdomains?

There are legitimate reasons that necessitate the use of subdomains and subdomains are not completely unavoidable.

Technical Limitations

Sometimes there are technical infrastructure limitations that prevent the use of a subdomain. In large organizations with big sites, it’s common for access to the root domain to be limited, instead using subdomains for ease of use.

This may include piecing together multiple CMSs. If the core site is hosted on one CMS like Magento or Sitecore, but the blog is hosted on WordPress, it can be difficult (or impossible) to make them work together on the root domain.

Organizational Control

Large organizations often have multiple divisions that operate independently. Such is the case with universities, where individual colleges need to have edit access to their own sites (School of Nursing, School of Engineering, etc.). The same is true for other national organizations like banking institutions.

It’s a lot easier to spool up a separate site on a subdomain and grant a team of people edit access to that particular subdomain. You wouldn’t want the School of Nursing making edits that ended up taking down the entire root domain for the whole college.

International

Sometimes organizations will create international subdomains like fr.chrisberkley.com or en.chrisberkley.com. There’s no inherent SEO benefit to including a country code in the subdomain, but it may comeback to organizational structure or technical limitations. In a perfect world, you’d place those in subfolders (chrisberkley.com/fr/ or chrisberkley.com/en/) and implement hreflang. Alas, we  don’t live in a vacuum and that isn’t always possible.

How Google Treats Subdomains

Working with subdomain-heavy clients, my firsthand experience is that Google treats subdomains as separate sites. A client of mine who had two divisions of their company had one set up on subdomain and another on the root domain. They had some content overlap and we sometimes saw their pages swap places in search results.

It’s my belief that subdomains don’t inherit domain authority or site equity from the root domain. WordPress.com has a domain authority of 94. If subdomains inherited that value, wouldn’t it make sense to setup free blogs on their platform (which uses subdomains) and immediately benefit from the SEO value?

Secondly, Google’s own Search Console requires you to set up separate profiles for subdomains. That’s another good indicator that they value subdomains differently.

That doesn’t mean subdomains inherit ZERO equity from their root domains. They may inherit a greatly reduced amount. OR, Google may adjust the amount of equity they inherit on a case-by-case basis. Since WordPress.com has thousands of low-authority blogs on subdomains, Google may devalue their subdomains more than other sites that only have a handful.

Google has stated that their search engine is indifferent to subdomains vs. subfolders, but the SEO community has repeatedly found that to be false. Industry thought-leader Moz moved their content from a subdomain to a subfolder and saw measurable increases just as a result of that move.

Questions? Comments? Leave them here or reach out to me on Twitter: @BerkleyBikes.

Speaking At WordCamp Lehigh Valley on August 18th

By Conferences No Comments

I’m excited to announce that I’ll be speaking at WordCamp Lehigh Valley on August 18th! WordCamp Lehigh Valley is a single day conference for WordPress experts and enthusiasts to come together and listen to presenters talk about innovative ways to use WordPress.

My session will focus on Using WordPress Tags & Categories Effectively. Tags and categories are often misused, often in ways that can cause confusion and SEO issues as a result of bloated sites with numerous thin or low value pages. I’ll discuss how to use these WordPress features in a meaningful way that provides benefit for both human site visitors and search engines.

Download My Slides

Gravity Forms Event Tracking with Google Tag Manager

By Analytics 10 Comments

You’re here because you want to use Google Tag Manager and Google Analytics to track form submissions using the Gravity Forms plugin. This tutorial, like my others for Contact Form 7 and Ninja Forms, will show you how to configure these platforms to track successful submissions, and use different form IDs to setup different goal conversions in GA. These are the steps we’ll be following:

Step 1: Configure Gravity Forms to use AJAX to submit the form.
Step 2: Create a GTM Tag that pushes a Data Layer event when the form is submitted successfully.
Step 3: Create a GTM Trigger that looks for the Data Layer event when the form is submitted, and triggers a second GTM Tag.
Step 4: Create a second GTM Tag that looks for the Data Layer push and creates Google Analytics Events.
Step 5: Create a form ID Data Layer Variable so that we can capture form ID.
Step 6: Set up a Goal Conversion in GA based on the GA Event from Step 3.

Step 1: Enable AJAX Submissions

If you use Gravity Forms’ default settings, the page will reload when the form is submitted, and none of these steps will work. Instead you need to enable AJAX submissions, which is done in the form’s shortcode.

Your normal shortcode looks like this:  gravityform id=”1″ title=”true” description=”true”

Your edited shortcode will look like this: gravityform id=”1″ title=”true” description=”true” ajax=”true”


Step 2: Create GTM Tag #1

The first tag is a few lines of Javascript that listens for a form submission. Technically it listens for the gform_confirmation_loaded event…which occurs when the confirmation message is loaded…which occurs when the form has been submitted. This is important because it differentiates between actual form submissions and false submissions (like when one of the required form fields is incomplete). The plugin fires a submit event WHENEVER the submit button is clicked (whether actually submitted or not) so the submit event is not reliable (and button clicks aren’t reliable with any plugin).

Here’s the tag you need to setup. I named it gravityFormsSubmission. 


Tag Type: Custom HTML

Add the following code:

<script>
jQuery(document).ready( function() {
jQuery(document).bind('gform_confirmation_loaded', function(event, formId){
	window.dataLayer.push({
            'event' : 'gravityFormSubmission',
            'gfformID' : formId		
	});
});
	})
</script>

Triggering: All Pages

This listens for the gform_confirmation_loaded event and fires an event into the Data Layer called “gravityFormSubmission.” It also grabs the form ID in the Gravity Forms shortcode and pushes it into the Data Layer too, you can see the different form IDs in the screenshot here.  You can use different forms with different IDs to create different Goal Conversions later in this tutorial.


 Step 3: Create a GTM Trigger

Next, create a Trigger for the Tag you’ve just created. Mine is Gravity Forms Trigger.


Trigger Type: Pick Other – Custom Event from the default list. We’ll use the event we created in Tag #1 as the trigger event.

Event Name: gravityFormSubmission

This Trigger Fires On: All Custom Events

This uses the custom Data Layer event from Step 1 to trigger a Google Analytics event tag that we will setup in Step 3.


Step 4: Create Tag #2

Create another tag and name it Gravity Form SubmissionFill out the following fields as such:

Tag Type: Universal Analytics

Track Type: Event

Category: You can set this as whatever you want and that’s what it’s going to show up as in Google Analytics when you go to the Events report. I named mine contact-form.

Action: I picked gfsuccessful-form-submission.

Label: If you want to track different forms separately, you need to set this as form-id-{{GFformID}} and follow the rest of these instructions closely.

Value: I did not add a value.

Non-Interaction Hit: I recommend selecting False – this will prevent the session from be counted as a bounce if the visitor only looks at one page, but completes a form submission before leaving.

Tracking ID: Your Google Analytics UA-XXXXXXXX tracking ID. I have mine set up as a custom, constant variable, which explains why it says {{GA Tracking Code}}

More Settings & Advanced Settings: If you’re an analytics wiz, there are advanced settings in here that you may want to configure. However, I did not change any of them.

When you’re done, you’ll end up with this:


Step 5: Create a Form ID Data Layer Variable

In Step 2 we pushed the form ID into the Data Layer when the form is submitted. Now we need to capture the form ID and get it into GTM and into our Google Analytics Events.


Add a new User-Defined Variable called GFformID.

Variable Type: Data Layer Variable

Data Layer Variable Name: gfformID (case sensitive).


Submit (publish) your updated GTM workspace and then we’ll move on to Google Analytics Goal configuration!


Step 5: Setting up the Goal Conversion(s)

In Google Analytics and navigate to Admin > View > Goals. Click +New Goal and set it up as such:

Goal setup: Select Custom

Goal description:

Name: Call it whatever you want. I’ve called mine Gravity Form Submission.

Type: Select Event.

Goal details:

Category: Equals to > contact-form

Action: Equals to > gfsuccessful-form-submission

Label: Select the form ID of the form you want to track. If you don’t want to track different forms separately, you can leave this blank. Mine was form-id-2.

Value: You can add a monetary value here if you’d like.

Use the Event Value as the Goal Value: If you set up a Value in ad a value attached to each event, you could set that up here. Since I did not, I will not.

Save the Goal Conversion and you’re done. If you want to set up other goals for different form IDs, just repeat the process but change the Label in the Goal Conversion.

Lastly, test the implementation by doing a couple test submissions on the site. You can use GA’s real time reporting to look for events firing. If you’re not seeing them, make sure you’re not excluding traffic with filters or opt-out extensions in your browser. For a mostly foolproof solution, submit the form on a mobile device using a data connection (no wifi), and use a completely unfiltered GA view to watch for the event.

Ninja Forms Event Tracking with Google Tag Manager

By Analytics 40 Comments

Tracking Ninja Form submissions as Google Analytics goal conversions is a bit complex when using Google Tag Manager. This post will show you how to set up tracking, log the form ID on submission, AND only track conversions when the form is actually submitted.

Step 1: Create a GTM Tag that pushes a Data Layer event when the form is submitted successfully.
Step 2: Create a GTM Trigger that looks for the Data Layer event when the form is submitted, and triggers a second GTM Tag.
Step 3: Create a second GTM Tag that looks for the Data Layer push and creates Google Analytics Events.
Step 4: Create a form ID Data Layer Variable so that we can capture form ID.
Step 5: Set up a Goal Conversion in GA based on the GA Event from Step 3.

Ninja Forms

Step 1: Create Tag #1

The first tag is just a bit of Javascript that listens for a form submission. When the form is submitted, it sends a DOM event called nfFormSubmitResponse – this event is only triggered when the form is actually submittedLog into GTM and create a new Tag (I’ve called mine nfFormSubmission) with the following configuration:

Tag Type: Custom HTML

Add the following code:

<script>
jQuery(document).ready( function() {
  jQuery(document).on('nfFormSubmitResponse', function(event, response, id) {         
      dataLayer.push ({
        'event' : 'ninjaFormSubmission',
        'NFformID' : response.id           
            });
         });
    });
</script>

Triggering: All Pages

This listens for the nfFormSubmitResponse DOM event and fires an event into the Data Layer called “ninjaFormSubmission.” It also captures the form ID in the Ninja Forms shortcode and pushes it into the Data Layer too (in the screenshot below, that ID is “2”). The form ID is what will allow you to create different Goal Conversions for different forms – we’ll revisit that in later steps.

Step 2: Create a GTM Trigger

Next, create a Trigger for the Tag you’ve just created. I named mine Ninja Forms Trigger.

Trigger Type: Pick Other – Custom Event from the default list. We’ll use the event we created in Tag #1 as the trigger event.

Event Name: ninjaFormSubmission

This Trigger Fires On: All Custom Events

This uses the custom Data Layer event from Step 1 to trigger a Google Analytics event tag that we will setup in Step 3.

Step 3: Create Tag #2

Create another tag and name it whatever you want (I used “Ninja Form Submission”). Fill out the following fields as such:

Tag Type: Universal Analytics

Track Type: Event

Category: You can set this as whatever you want and that’s what it’s going to show up as in Google Analytics when you go to the Events report. I named mine contact-form.

Action: I picked ninja-successful-form-submission.

Label: If you want to track different forms separately, you need to set this as form-id-{{NFformID}} and follow the rest of these instructions closely.

Value: I did not add a value.

Non-Interaction Hit: I recommend selecting False – this will prevent the session from be counted as a bounce if the visitor only looks at one page, but completes a form submission before leaving.

Tracking ID: Your tracking ID. I have mine set up as a variable, which explains why it says {{GA Tracking Code}}

More Settings & Advanced Settings: If you’re an analytics wiz, there are advanced settings in here that you may want to configure. However, I did not change any of them.

When you’re done, you’ll end up with this:

Step 4: Create a Form ID Data Layer Variable

In Step 2 we pushed the form ID into the Data Layer when the form is submitted. Now we need to capture the form ID and get it into GTM and into our Google Analytics Events. 

Add a new User-Defined Variable called NFformID.

Variable Type: Data Layer Variable

Data Layer Variable Name: NFformID (case sensitive).

Submit (publish) your updated GTM workspace and then we’ll move on to Google Analytics Goal configuration!

Step 5: Setting up the Goal Conversion(s)

In Google Analytics and navigate to Admin > View > Goals. Click +New Goal and set it up as such:

Goal setup: Select Custom

Goal description:

Name: Call it whatever you want. I’ve called mine Ninja Form Submission.

Type: Select Event.

Goal details:

Category: Equals to > contact-form

Action: Equals to > ninja-successful-form-submission

Label: Select the form ID of the form you want to track. If you don’t want to track different forms separately, you can leave this blank. Mine was form-id-2.

Value: You can add a monetary value here if you’d like.

Use the Event Value as the Goal Value: If you set up a Value in ad a value attached to each event, you could set that up here. Since I did not, I will not.

Save the Goal Conversion and you’re done. If you want to set up other goals for different form IDs, just repeat the process but change the Label in the Goal Conversion.

Lastly, test the implementation by doing a couple test submissions on the site. You can use GA’s real time reporting to look for events firing. If you’re not seeing them, make sure you’re not excluding traffic with filters or opt-out extensions in your browser. For a mostly foolproof solution, submit the form on a mobile device using a data connection (no wifi), and use a completely unfiltered GA view to watch for the event.

Get Ninja Forms!

Ninja Forms

Using Contact Form 7 instead? See how to track CF7 form submissions with GTM and GA.

How Long For Content To Rank?

By Content Marketing, SEO One Comment

The number one struggle I face with pitching clients and showing them the value of SEO, is that it takes time. Whereas pay-per-click advertising and social media can be spun up relatively quickly and provide a return on investment rather quickly, SEO is an annuity investment.

To make a relevant analogy: you can’t invest money in the stock market today and expect dividends tomorrow. The money you invest today is done so with the understanding that it will provide value later. SEO is similar.

Nevertheless, that’s a real problem because when clients are making a significant investment in SEO, they want to see results. That’s why I prepare clients by telling them “some of the work we do isn’t going to yield results right away. It’s going to take 6-12 months.”

This is especially true with publishing new content. Ahrefs did a study about how long it takes to rank in Google. They looked at the average age of pages ranking in positions 1-10, and the overall takeaway was that higher positions typically featured pages that have been live for several years. They also noted that higher authority sites took less time to rank well, which is a no-brainer. If there’s one single graph that shows their findings best, it’s this one:

That’s helpful, but does their large scale study align with actual first hand findings? Sure there’s value in a larger data sample, but having actual anecdotal data would certainly help reinforce those findings.

Fortunately I have that data. Across multiple clients in multiple industries, I can highlight examples of pages that rank well for target keywords, but didn’t reach full potential until months after they were published. I’m sharing these examples so that both consultants and clients can form realistic expectations for SEO campaigns, which is something I believe this industry can and should do a much better job at.

Example #1

Client Industry: Construction

Type of page: WordPress blog post

This particular page targeted “rental cost” keywords which are fairly low volume but highly relevant in the client’s industry. The client was hesitant to discuss pricing, but competitors were doing it, so we pushed them to create their own page. Not only does it drive meaningful traffic, but it has resulted in ~3 leads per month since it was published 16 months ago.

Example #2

Client Industry: Web hosting

Type of page: Resource center pages

These two pages were both created as part of a large content initiative – more than 120 pages of long form content over a one year period. Notably, they both saw steady growth and then marked increases in January 2018, possibly as a result of an algorithm update.


Example #3

Client Industry: Healthcare

Type of page: Core site page

This page saw long periods of inactivity in the very competitive healthcare space, before eventually moving into ranking positions that drive meaningful amounts of traffic (this is also a result of other improvements made to the site during that time).

Example #4

Client Industry: Local retail

Type of page: WordPress blog post

This example comes from a mom & pop retail store. A blog post that I wrote eventually moved into top ranking positions for some industry head terms, outranking even the brands that the retailer sold in their store. Unfortunately, the business owners did not continue digital marketing efforts after I left my position there, and the content did not retain its visibility in search results.

Example #5

Client Industry: Digital marketing

Type of page: WordPress blog post

The last example comes from my own website (which has lower site authority than any of my clients). While not initially a large traffic source, an analytics blog post I wrote moved into top positions (including the answer box) over a period of one year.

Summary

The key takeaway here is that firsthand data supports the study that Ahrefs did – that content may take months or more to move into top ranking positions, especially for competitive keywords. Site authority absolutely helps – two of the sites included here had domain authority ratings between 50 and 80, which is a rough indicator that they’re authoritative, especially in their respective industries.

With some of the examples, we did employ other tactics like building internal and external links. All pages were submitted to Google Search Console after publishing to make sure they got crawled as soon as possible. Also obvious is the fact that none of these pages were in a vacuum meaning that there were other marketing (and SEO) initiatives that could’ve contributed to better rankings. Nevertheless, there is a clear pattern showing that even highly optimized content on authoritative sites doesn’t always achieve top rankings immediately, and SEO continues to require patience.

How To: Optimize WordPress Posts & Pages For SEO

By Content Marketing, SEO One Comment

WordPress is a brilliant CMS that offers a plethora of SEO functionality out-of-the-box. But like any piece of technology, default settings won’t be enough to truly maximize its potential.This post will show you how to optimize a WordPress post (or page) for SEO purposes.

The WordPress SEO Plugins

While WordPress is good out of the box, it needs an SEO plugin to take it to the next level. The gold standards are either Joost de Valk’s Yoast SEO Plugin or All In One SEO Pack by Michael Torbert. Both add critical functionality for SEO purposes, so make sure you have one installed.

Content

No amount of optimization will help if you’re targeting topics with low or non-existent search volume. The same can be said for high volume (and high competition) topics. You have to pick topics and themes that are realistic and within your wheelhouse to achieve SEO success.

First we’ll start with the post content itself, focusing on how to structure the page with H headings and overall content length.

H Headings & Page Structure

Start by adding a post title. In many WordPress themes, the post title will also be present on the page as an H1 heading. Pages should only have one H1 heading and it needs to be keyword-rich and descriptive of the post’s content. The H1 is the first text a visitor sees when they hit the page.

In addition to H1 headings, it’s increasingly important to structure pages with additional, nested H headings like H2s, H3s, H4s, etc. These should also be keyword-rich and describe the subsequent paragraph. On this very page you’ll see a clear structure where paragraphs are ordered and grouped by similarity and marked up with a clear hierarchy of H headings.

If you know your subject matter and audience well, developing a hierarchy of H headings may be second nature to you. If not, performing keyword research can typically reveal different subtopics and then you can apply common sense to order them in the method that makes the most sense for visitors.

Ordered and Unordered Lists (Bullet Points)

To break up content and make it more digestible, use ordered lists (numbered lists) and unordered lists (bullet points) where applicable. Using these with a keyword-rich H heading may result in securing a featured snippet (answer box) in search results.

  • Anytime you’re describing steps, consider using an ordered list.
  • If you’re listing several things using commas, try bullet points instead.

This is not only helpful for SEO, it helps readers digest a page more easily.

Content Length

Content length is much debated and the honest answer to “what’s the right length” is that there isn’t one. If the content is engaging, people will read it. Know your audience, write quality content and you’ll succeed.

With that being said, 250-300 words is commonly considered the absolute minimum for SEO purposes. Less than that and search engines may deem the content thin. It will be incredibly difficult to add a meaningful structure of H headings to a page with 300 words.

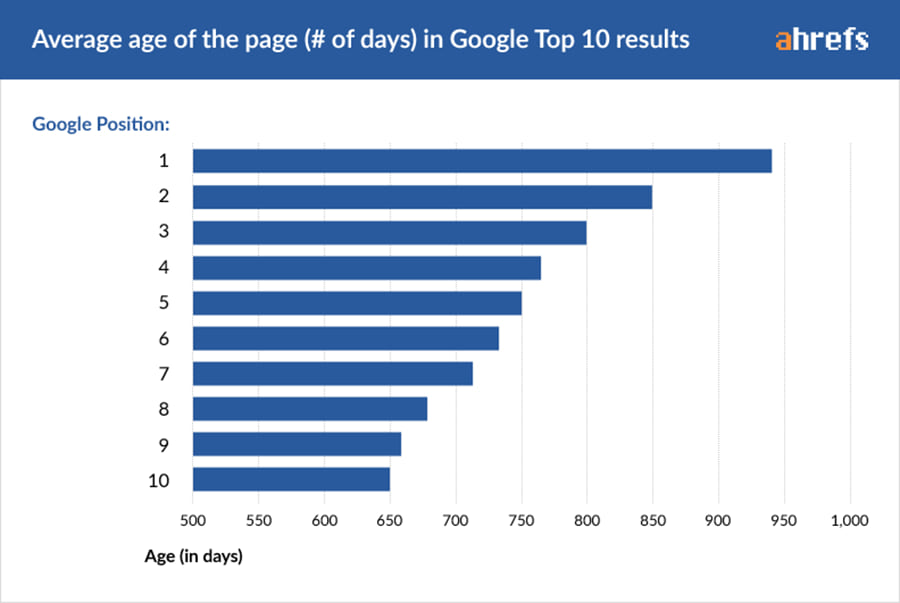
I recommend content that’s a minimum of 500-700 words. In many cases, long form content can do wonders for SEO and when I say long form I mean 1,000 words or more. Most of my successful posts are detailed how-tos in excess of 1,000 words. Your mileage may vary – put your focus on writing good content and worry less about the length.

Video, Images & Media

Video, images and media are also great ways to break up text-based content and provide additional value for visitors. Would the topic you’re discussing be more easily understood if a visual were added? In many cases, yes.

Here I’ll discuss ways to optimize media for SEO, and also for visitors with disabilities or impairments, who may not be able to consume images, video or audio.

Image Optimization

Images can be improved for SEO by using filenames, alt text and by optimizing image sizes (for site speed). Because search engines can’t visually determine the contents of an image, these optimizations allow them to understand image content, helping the page rank better and helping images to rank in image search results. Additionally, visitors with visual impairments may not be able to see images, so these optimizations help them consume and understand multimedia content.

Image Filenames

Including keywords in filenames can have impact. It’s not huge, but every bit helps. Use descriptive keywords in filenames when possible but don’t start keyword stuffing – make them descriptive and methodical.

Image Alt Text

Include image alt text when possible. The alt text is never seen by visitors unless A) the image doesn’t load or B) the visitor is impaired and the alt text is read to them.

Both of these scenarios help visitors understand the content of the image, even if it can’t be seen. For that reason, make your image alt text descriptive of what’s in the image and avoid keyword stuffing.

wordpress seo image alt text

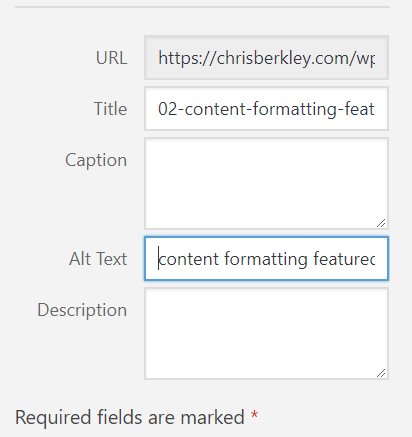
The alt text for the image immediately above: wordpress seo image alt text

Image Size Optimization

Your images should only be as large as they need to be. Often, GIANT images are scaled down to a much smaller size with HTML. The problem is, if you have a giant image with an enormous file size, browsers have to load the entire image, even if it’s being displayed at a much smaller size. That slows down page speed, especially if there are multiple large images on the page.

Make the image as big as it needs to be. If the image will be displayed at 900 pixels wide, then make it 900 pixels wide. Secondly, use JPG images instead of PNGs – JPGs are significantly smaller in file size. If you don’t have an image editing program, you can do it right in WordPress from the Media Library menu.
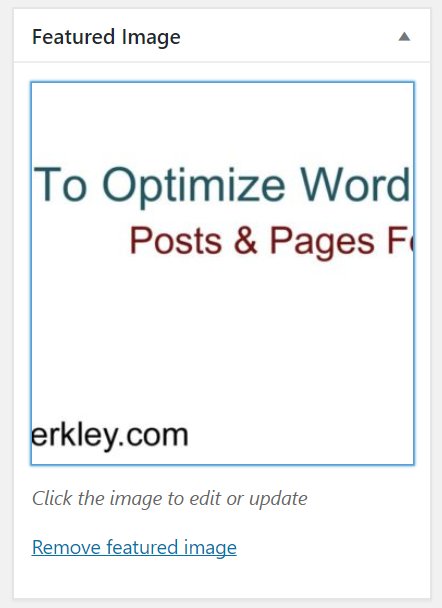
Featured Images

Add a featured image. The featured image will be used as the default image when a page or post is shared on social media, although this can be changed for different social networks.

Video

Similar to images, video content also has opportunities for on-page optimization. Video content is equally hard for search engines to understand, so we optimize by adding context in other ways.

Embedding

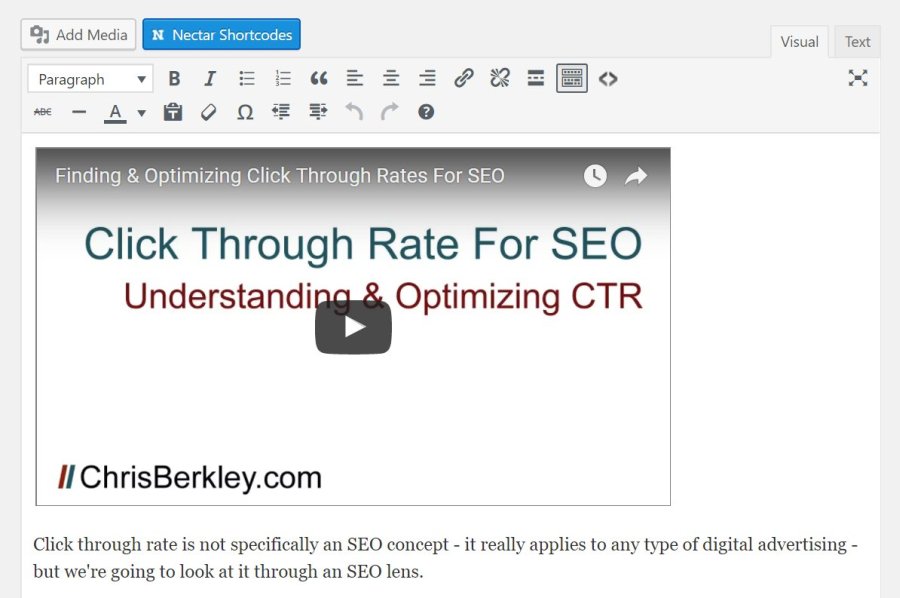
Embedding video content on WordPress posts or pages is quite easy, especially for YouTube, Wistia and Vimeo. With any of these three, you can simply drop the URL into WordPress’ WYSIWYG editor and it will automatically embed the video. Embedding videos on-site is a great way to get more views and provide a superior user experience.

Schema

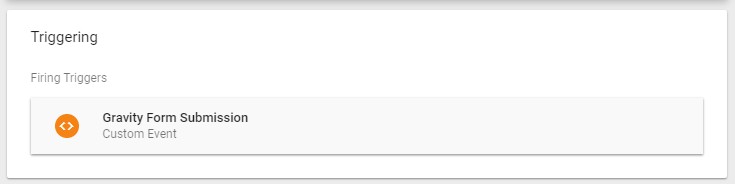
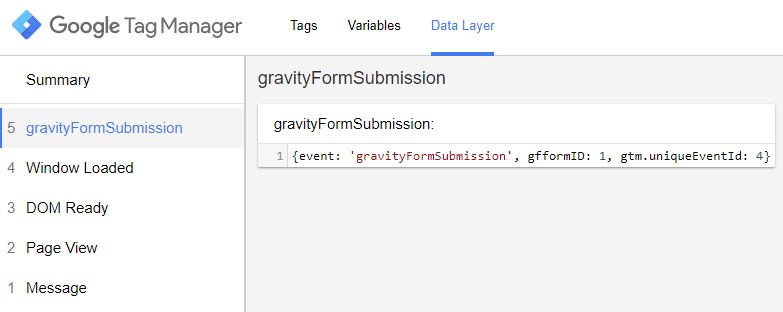
When you do embed video content, make sure you add Schema as well. If you’re using Wistia, you’re in luck, because Wistia embeds Video Schema by default using Javascript (read more about Wistia videos & schema here).

YouTube and Vimeo users are not as fortunate however, and must add Schema manually, preferably using custom fields. JSON is Google’s preferred version of Schema and creating the Schema is not difficult at all. Schema gives search engines additional information about videos, such as the video’s title, description, length, upload date, etc. Schema is the only way for search engines to get information about video contents.  

<script type="application/ld+json">
{
"@context": "http://schema.org",
"@type": "VideoObject",
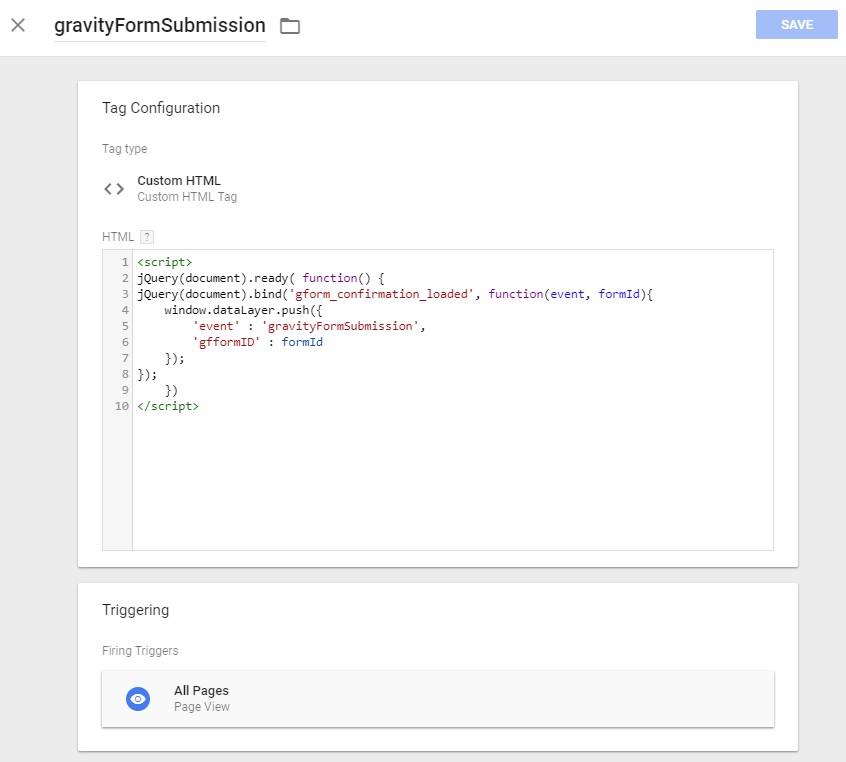
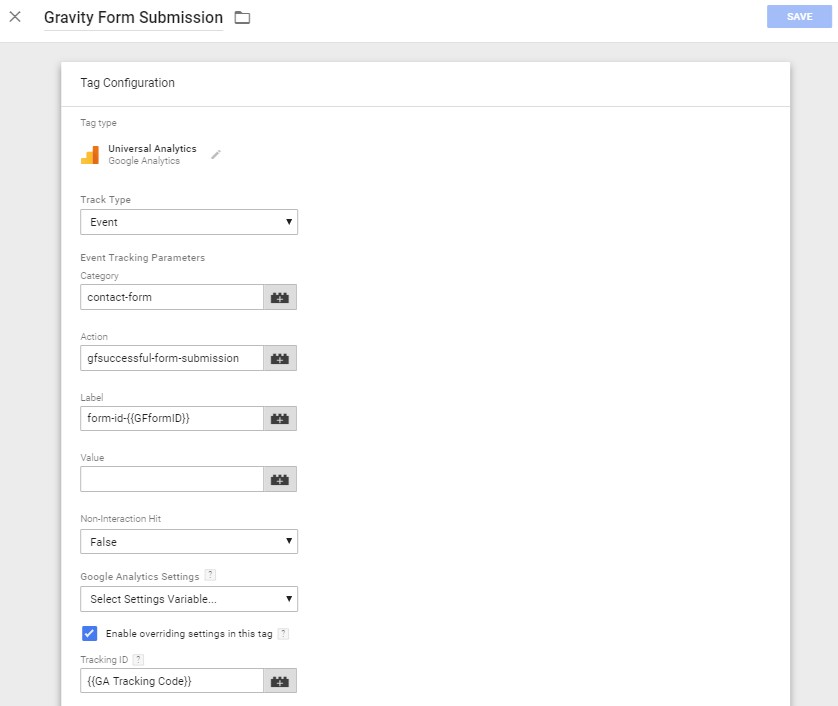
"name": "Contact Form 7 Goal Conversion Tracking Google Tag Manager",
"description": "Follow this 10 minute guide to set up Google Analytics goal conversion tracking for Contact Form 7 submissions using Google Tag Manager.
If you have a WordPress website and you use the Contact Form 7 plugin, you can use Google Tag Manager to create events and set up Goal Conversions in Google Analytics. Then you can attribute form submissions to different marketing channels and campaigns that you're running.
This guide not only shows you how to track submissions, but also ensures that you're only tracking successful submissions where mail is actually sent. It also allows you to specify which forms you want to track, based on the form ID built into the Contact Form 7 shortcode. 
***Links***
Written how-to guide: https://chrisberkley.com/blog/contact-form-7-event-tracking-google-tag-manager/
Javascript code for Tag #1: 
https://chrisberkley.com/wp-content/uploads/2017/11/wpcf7mailsent-javascript.txt
Troubleshooting your setup:
https://chrisberkley.com/blog/troubleshooting-contact-form-tracking-with-gtm/",
"thumbnailUrl": "https://i.ytimg.com/vi/oTZG7A3RjT8/maxresdefault.jpg",
"uploadDate": "2017-11-19",
"duration": "PT10M1S",
"embedUrl": "https://www.youtube.com/embed/oTZG7A3RjT8"
}
</script>

Transcripts

Transcripts can be really critical. Not only do they give impaired users a full transcript of the video’s content, but they can be keyword-rich and help a page rank if the video is especially relevant to the target keywords.

I don’t always include transcripts, but often recommend including them in an accordion drop-down, so as not to disrupt the flow of existing text on the page. If the page doesn’t have much additional text, transcripts can easily be adapted into blog posts.

Meta Data

Meta data is still really important for SEO. Both Yoast’s plugin and All In One SEO make it very easy to add a title tag and meta description, even warning you if you approach character limits.

Title Tags

Using your chosen SEO plugin, write and add an optimized title tag. Shoot for 45-60 characters. Excessively long titles will be truncated in search results.

I prefer to include the target keyword at the beginning and then include branding at the end. Title tags should grab the searcher. I’m a fan of using question-based title tags if they’re relevant. Here’s the title tag for this post:

How To Optimize WordPress Posts & Pages For SEO | Chris Berkley

Meta Descriptions

Meta descriptions should be up to 230 characters and describe the page’s contents – be as descriptive as possible. Meta descriptions are the key to encouraging searchers to click through from search results and can have a big impact on click through rates.

Tell searchers what value the page will provide and what they’ll find. Include branding if possible. End with a CTA telling them what to do once they land on the page.

Here’s the meta description for this page:

Optimizing WordPress posts and pages is critical for SEO. Follow this comprehensive guide to make sure your content is FULLY optimized, using all of WordPress’ advanced functionality.

Social Markup

SEO plugins make it easy to add Open Graph and Twitter Card markup to the page. These meta tags are specifically for social media and add rich snippets when URLs are included in social posts.

Even without social markup, most social networks will pull the page title, description and image to create a rich snippet. However, these aren’t always optimal – they frequently pull the wrong or completely irrelevant images. Optimizing this markup allows you to customize titles, descriptions and images for use on social media.

Open Graph Markup

Open Graph is a standard markup most notably used by Facebook, LinkedIn and Pinterest. The two SEO plugins I mentioned before automate the creation of Open Graph markup using the title tag, meta description and featured image that you’ve added to the page. However, they also allow you to customize these fields specifically for social media – this is especially easy using the Yoast plugin.

Say you wanted to add a catchier title/description/image for use on social media. You can do that without impacting your SEO efforts by changing the title tag & meta description that Google uses.
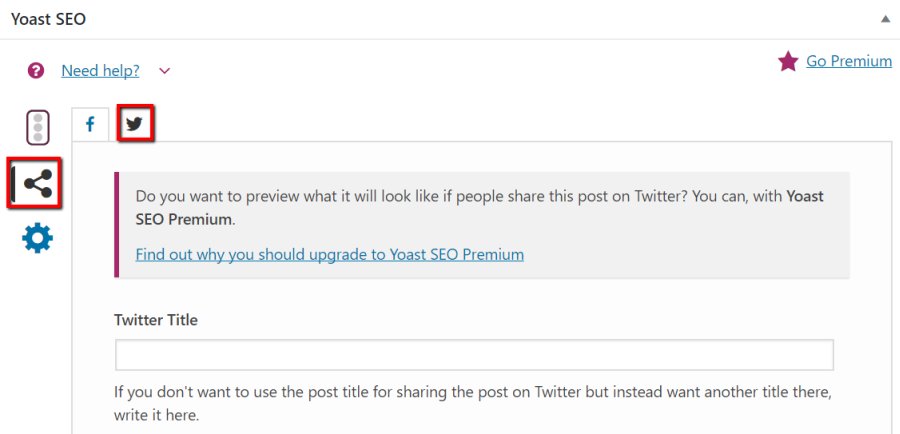
Twitter Cards

Rather than use Open Graph markup like most other networks, Twitter elected to create its own (very similar) markup called Twitter Cards. You can customize these too just like Open Graph markup.

Linking

Internally linking pages is really important for both visitors (they can find related content) and search engines (can crawl the site more easily). Internal links can be added in a number of ways, but some are more valuable than others.

Links In The Body Copy

Body copy links are arguably the most valuable, assuming they’re done naturally and in moderation. No one likes a page where every other sentence is a link – it’s incredibly distracting and results in a poor user experience. Use links where they fit naturally.

Internal Links

Internal links (links from one page on your site to another page on your site) are valuable for helping visitors find related content and improving the ability for search engines to crawl the site. I recommend setting these to open in the current tab.

External Links

Linking out to other sites is fine too. If there’s a page on another site that would provide value to your visitors, link out to it. I recommend opening these in new tabs, to encourage visitors to stay longer on your site.

Anchor Text

Anchor text is the phrase that gets hyperlinked to another page. You should aim to use keyword-optimized anchor text, especially for internal links (keyword-rich anchor text is not as necessary for external links).

There are several links within this article that link out to other related topics, using anchor text keywords relevant to those topics.

Categories & Tags

Use Categories and Tags methodically. Keyword stuffing them has no benefit for SEO purposes. Instead, they should be used to help visitors browse the site to discover related content. Additionally, Categories & Tags have a ton of value for search engines as they make it easy to crawl the site and find additional pages.

Categories & Tags are the first line of defense against island pages and semi-automate internal linking. However, blog category pages typically contain dynamic content (unless setup otherwise) and typically don’t present much value for ranking purposes.

Build out some pre-determined Categories & Tags and stick to them, adding new ones as you go. Avoid using the same categories as tags and vice versa. Think of Tags as sub-categories. Below is a sample diagram of a Category-Tag structure.

Authors

Adding author details can establish credibility to the post by showing an appeal to authority. WordPress editors have the option of changing the author at the bottom of the post. Don’t ever leave the post author as “Admin.”

Authors should have photos & biographies describing who they are. There’s no inherent SEO value here (not anymore), but it shows readers who actually wrote the content. I always include links to my Twitter page for people to ask questions about my content.

Technical

Schema

Schema (Structured Data) helps search engines crawl and index web pages by specifying specific pieces of content. There are many types (I won’t describe them all) which can be found at Schema.org.

A few common types are:

  • Video
  • Product
  • Person
  • Location

I recommend following Torquemag’s guide to setting up custom WordPress fields for Schema. You can also read more about Schema and Structured Data with Google’s developer documentation.

URL Structure

When you save your post or page as a draft, you’ll see that WordPress automatically takes the post title (H1) and also uses it for the URL. In this case, you may choose to edit the URL, but make sure it’s still keyword-rich. You want your most valuable keywords in the URL.

If you’re creating a page (not a post) you’ll see that you have the option of selecting a parent page. Should you add one? It comes down to site structure and strategy. If the page you’re creating falls naturally as a child page to another page, then take advantage of it.

Adding a child/parent page isn’t a silver bullet for SEO. It’s part of a bigger SEO strategy centering around how content is structured on your site. If have a careful hierarchy built out, adding URLs that reflect the site structure is icing on the cake.

The Difference

Following these steps can be the difference between content that ranks and content that doesn’t. Content has been increasingly important, especially as backlinks have become less influential as a ranking factor.

Checklist

If the number of steps seems intimidating, download this checklist and integrate these steps into your content publishing process.

Download The Checklist